As I can see, you pass “albedo” texture to the deferred shader, but you should mix albedo and reflection before this, and then pass result of this operation. Or you can change deferred shader and mix reflection with albedo in single pass with deferred shading.
Ah. Yes. That makes sense. For my defense I will only say I’m dyslectic ![]()
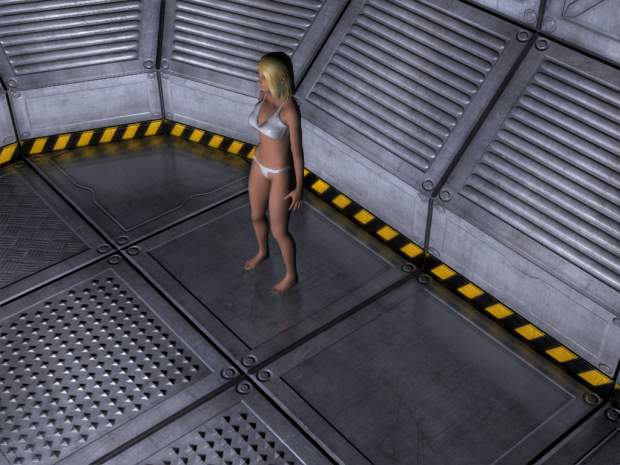
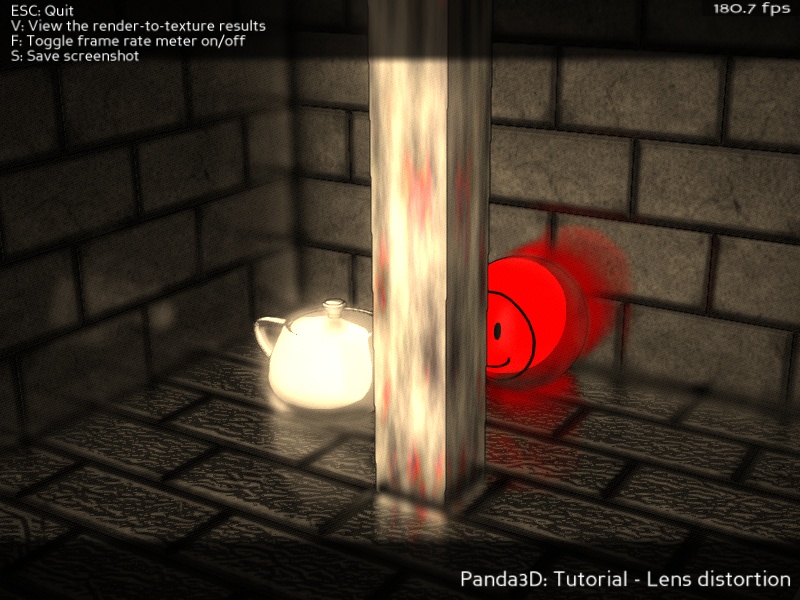
Got it working:
youtu.be/C5g3hRrtBCA
The scene is very bad for that, but you can just about see the reflection of the column on the tiles.
Thanks!
I’ve made some more improvements, now I’m using the alpha channel of the normal map to write the mask, so I need one less buffer and with some minor tweaks to the setting I think I got it working pretty good:
Here are two extra videos:
youtube.com/watch?v=AliblKAezxg
youtube.com/watch?v=SxsMc50780Y
That looks great! Though it looks like the reflection lags behind by one frame - perhaps you didn’t set the sort value on your buffer appropriately, or perhaps the sort value on an update task?
I don’t see that effect ‘live’ it poped up in the video. But it’s true - I didn’t set the sort value and that may be an error. I’ll set it to a negative nunber and see if it helps. Thanks.
Wow. Nice job, ninth!
I think this could be another candidate to include into CommonFilters, if rdb is ok with it.
But first things first - would you mind if I integrated this, too?
Sure, why no.
btw, currently common filter uses CG shaders which have some trouble with the non-Nvidia graphic cards. Maybe consider translation Shader generator and common filters under GLSL?
Thanks! I’ll see what I can do ![]()
(This will probably be after 1.9.0, though. I think gloss map support is pretty much essential to use SSLR in real scenes, and adding that may require changes to the main shader generator, in order to render a full-screen gloss map texture based on material properties.)
In the long term, moving over to GLSL is probably the right thing to do, as Cg is no longer maintained anyway.
But at the moment, I have to admit it’s not very high on my priority list - I’m currently re-engineering the CommonFilters architecture, as adding any more filters to the current one would make it unmaintainable. The new one will (hopefully) be cleaner, and easier to code custom filters for (although more complex internally, as more things will be automated).
In the meantime, it seems the most common problem with Cg are the limitations of the arbvp1 and arbfp1 profiles (which work on all cards), and specifically the lack of variable-length loops (because these profiles require all loops to be unrolled).
With a shader generator (such as CommonFilters), it is possible to work around this particular problem to some extent. If the upper limit of the loop is constant but configurable, the appropriate value can be hardcoded by the shader generator just before the shader is compiled. Then, if the value of the parameter is changed by the user at runtime, the shader generator invokes a shader recompile. The existing CommonFilters already uses this approach, and I used it also in my integration code for the lens flare filter. It does have a drawback - the shader recompile will cause the next frame to take more time to render, because all the shaders need to be set up again.
And of course, this doesn’t help for cases where the loop limits need to actually vary between frames, or between pixels ![]()
SSLR is now added to the new postprocessing framework. See [url]CommonFilters - some new filters, and the future].
Taking artistic liberties to enable a few more filters, and with some minor adjustment to the lighting setup, here’s the same test scene:
This is great! What is the license on the code/texture?
The brick texture came from ninth’s original example, so I’ll leave that part for him to reply.
As for the code, ninth said it’s ok to integrate his original code into CommonFilters, so I would interpret this as “the same license as Panda itself”.
My contributions (the postprocessing filter framework, any new original filters, and the modifications that transformed ninth’s original SSLR and LensFlare examples into LocalReflection.py / LensFlare.py, respectively) are under the same license as Panda itself.
Which, explicitly, is the modified BSD license: https://www.panda3d.org/license.php
I heard from rdb that the 1.9 release was too soon for including these changes, but they are being considered for 1.10, tentatively in a few months (but as usual in software releases, the date is subject to change without prior notice).
In the meantime, if you want the version of SSLR that is integrated into the new postprocessing framework and has the blur option, you can get the code from this forum. As of this writing, CommonFilters190_with_retro.zip is the latest one containing the framework and all the new filters, provided as an attachment here: https://discourse.panda3d.org/viewtopic.php?f=9&t=17232&start=60#p101361.
Note that some minor things (possibly also the collection of filters available in the default set) will change in the final version; the exact details have not been decided yet.
EDIT: usage example now available in https://discourse.panda3d.org/viewtopic.php?f=9&t=17232&p=102771#p102771
Until I get around to writing a proper usage example, if you want to try running this, for an easy approach you can look at the backward-compatible API functions in CommonFilters.py - it works roughly the same as the old CommonFilters, but has more filters available. It should be pretty simple to get it up and running following one of the old examples on CommonFilters.
The only change required is importing your local CommonFilters190.CommonFilters instead of Panda’s default direct.filter.CommonFilters. In the final version, the module will be moved into the default location (replacing the old one).
If you’re feeling adventurous and want to try the new API, in short it works as follows. First, instantiate a FilterPipeline object and the desired filter objects (e.g. LocalReflection; for a complete list, go to the CommonFilters190 directory in your terminal and run python -m ListAllFilters). Then, call the addFilterInstance() method of FilterPipeline to bind each filter instance to the pipeline.
(Note that each filter instance can be bound to only one pipeline. But the other way around, one pipeline is allowed to have several instances of the same filter, provided that they are placed at different points in the render sequence.)
From the perspective of client code using existing filters, the classes Filter, FilterStage, CompoundFilter and RapidPrototypeCompoundFilter are internal and there is no need to use them.
To configure the filters, just write to their properties (either before or after binding, doesn’t matter; the pipeline automatically rebuilds when it needs to). See the Python help for each module for details on what’s available - they should all have fairly detailed docstrings. (And finally, feel free to post in the CommonFilters thread if you need help.)
You can also mix and match the APIs (hint: CommonFilters.py stores its filter instances in data members), but that’s neither recommended nor officially supported ![]()
Good info. Straight to the point, thanks.
I have a working implementation of “HZB” Screen Space Reflections following
https://sakibsaikia.github.io/graphics/2016/12/25/Screen-Space-Reflection-in-Killing-Floor-2.html
I’d call it “tree based searching” but apparently the common name is Hi-Z Buffers (HZB) from
“Hi-Z Screen-Space Cone-Traced Reflections”, (Yasin Uludag, GPU Pro 5)
The main advantage is no approximations aside from the intrinsic limitations of all SSR. So you trace all rays at full resolution to the edge of the screen and get pretty much no artifacts as a result and still keep a pretty good framerate. The cost is O(log2(height) x height x width ) so pretty tolerable.
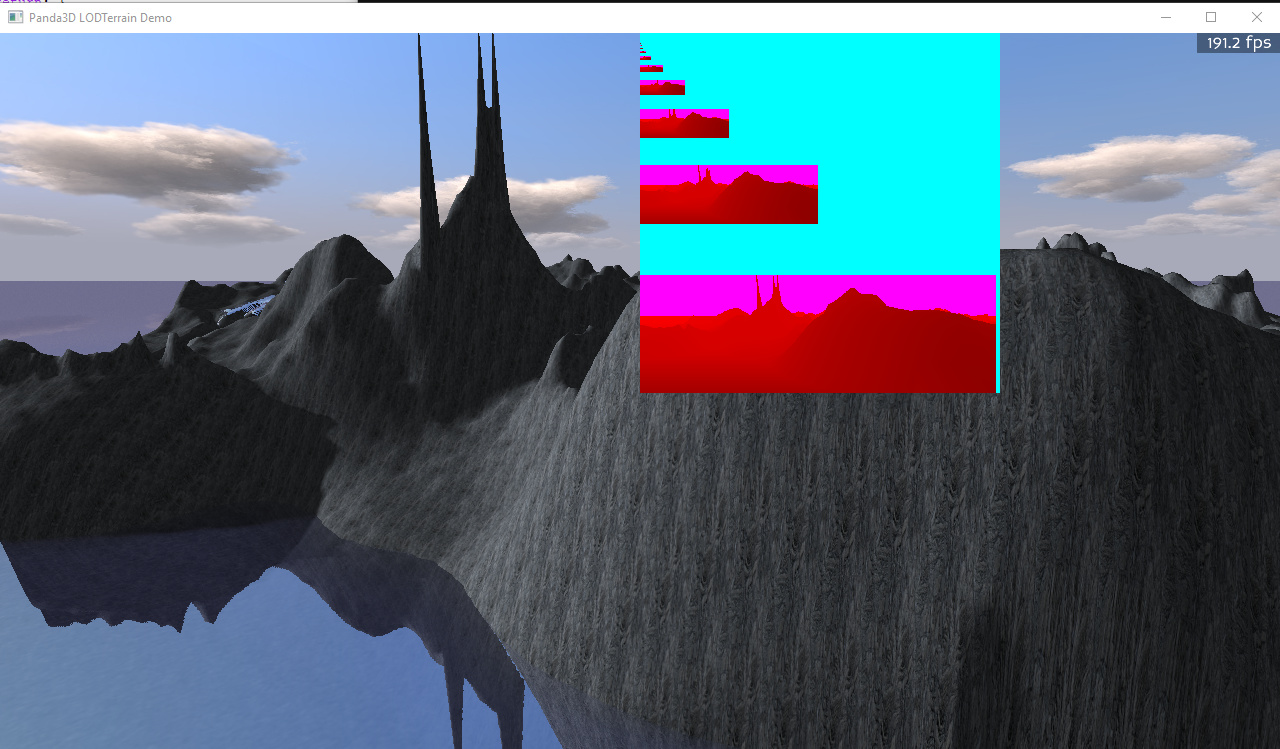
First up – my code is a total hack, I even hardwired the window size into the shader for now - I ended up partitioning a really big texture to make a depth mipmap by hand before I thought to ask how to access mipmaps with Panda. [There is a more or less undocumented version of setShaderInput (see the C++ reference) that lets you do it – thanks rdb.] You can see the big depth texture overlaid on the image above with all its half sized copies. The colouring is arbitrary by me – its just a float r32f texture. So as of writing this is just a proof of concept – you can do HZB in Panda and make it fast
For now I’ll just outline the key parts of the approach:
- I used the filterManager’s RenderSceneInto to capture depth, normal , reflectance and colour information in textures.
At this point you could follow on with any SSR approach including the one above. However, you need to skip a lot of texels or artificially limit the ray length to make it run in a reasonable time which gives you artifacts in the image. I looked at the code by wezu and ninth and see something like 16 texel samples per ray is typical.
Here is a snippet from the start of all the SSR fragment shaders I use (standard and HZB) (glsl):
       // Work in world space initially

        vec3 SurfNormal = texture(normalTex, l_texcoord0).xyz*2-1;

        vec3 rayin = SurfPosWorld.xyz-wspos_mycamera; // un-normalized
        // Reflected ray
        vec3 rayout = normalize(-dot(SurfNormal,rayin)*2*SurfNormal + rayin);
        vec4 farWorld = vec4(SurfPosWorld.xyz+rayout*10.,1);
        vec4 farNDC = trans_world_to_clip_of_mycamera*farWorld;
        farNDC /= farNDC.w;
        // ray step in screen space.  Due to the magic of perspective and NDC,
        // straight lines in world space are straight in NDC clip coordinates
        vec3 stepNDC = (farNDC.xyz-SurfPosNDC.xyz);
The essential feature is working in screen (=NDC =clip) space for your ray march, a trick attributed to these guys:
http://casual-effects.blogspot.com/2014/08/screen-space-ray-tracing.html
- The key to HZB is low resolution versions of the depth buffer that contain the minimum depth for entire regions of the depth buffer. This lets you take really big steps in screen space without missing any intersections. How big? – as big as the whole screen at once in principle. Conceptually its like building a tree out of the depth buffer where each node knows the minimum of all child nodes and the leaf nodes are the texels of the full resolution depth buffer.
I used two shaders to create the smaller subimages using the min of 4 texels each time. I put these images at an offset in the same texture which is very wasteful of the texture image but seems to have no performance cost. The min making shaders are really simple (following the ones in the Killing Floor link but in glsl:).
My level to level min calculating compute shader is here. I used 8x4=32 core work groups because that is a warp size supposedly.
#version 430

layout (local_size_x = 8, local_size_y = 4) in;
layout (r32f) uniform image2D depthLODTex;
uniform ivec2 offset;

void main() {

  ivec2 del=ivec2(1,0);
  ivec2 Coord = ivec2(gl_GlobalInvocationID.x*2+1,gl_GlobalInvocationID.y*2+offset.x);
  ivec2 CoordLOD = ivec2(gl_GlobalInvocationID.x+1,gl_GlobalInvocationID.y+offset.y);
  float z_x00_y00,z_x01_y00,z_x00_y01,z_x01_y01,zmin;
  z_x00_y00 = imageLoad(depthLODTex, Coord).x;
  z_x01_y00 = imageLoad(depthLODTex, Coord+del.xy).x;
  z_x00_y01 = imageLoad(depthLODTex, Coord+del.yx).x;
  z_x01_y01 = imageLoad(depthLODTex, Coord+del.xx).x;
  zmin = min(min(z_x00_y00,z_x01_y00),min(z_x00_y01,z_x01_y01));
  imageStore(depthLODTex,CoordLOD,vec4(zmin));
}
The panda code that uses it looks like this:
node_path = render.attach_new_node("depthshrink2")
node_path.set_shader(compute_shader2)
node_path.set_shader_input("depthLODTex", self.depthLODTex)
...
cn = ComputeNode("compute2")
cn.add_dispatch(iworkx,iworky,1)
node_path2 = node_path.attach_new_node(cn)
node_path2.setBin("fixed",ipriority)
node_path2.set_shader_input("offset", (offset,offset+delta_offset) )
I can attach as many extra compute nodes as I need to build all the subimages and iworkx and iworky get half as big every time until the last one is 1,1. I repeatedly called the shader until I was down to 1x1 pixels. The texture it makes is shown above. Using shaders (even running them 12 times per frame) this step is crazy fast – probably 0.002-0.004 sec total per frame I’d guess. [Note: I am hoping I can replace this monstrosity with a clean set of hand made mipmaps]
The compute nodes all live in the “fixed” render Bin with priorities set to make sure they execute in the right order every frame after the renderSceneInto is done and before the final SSR shader.
-
I made sure each subimage was surrounded by depths with a value of 2 (cyan in the inset above). This is easy – you just clear the depthLODtexture to 2 when you make it. This is why there is +1 offsets in the integer coordinates for the imageLoad and imageStore. This means I don’t have to test to see if I am off the edge of the screen explicitly. If my current depthLODTex value = 2 then I have gone past the edge and can stop. I even went one level past 1x1 in the subimages so I have maxlevel+1 map with all texels=2 on it which catches very low res rays leaving the image.
-
Finally, I use the quad returned from renderSceneInto with a shader that does the SSR ray marching (what comes after the fragment code is above). I used the HZB algorithm/shader code in a very similar form to the code at the killing floor link. Note that the shader code there seems incomplete to me - its more like pseudo code. Going up and down mipmap levels was complicated slightly (for me) by the need to get the offset of that subimage in my big texture. I also tend to use texelFetch not texture because it seems to be faster (in my experience and there are also comments to that effect on the web). I also like using integers to know exactly what texel I am getting when resolution is changing
-
The ray starts at the reflector location (e.g. water surface) on the screen and marches off in the direction given by the stepNDC vector. If my ray misses everything or is directed back at the viewer (delta z < 0) then I find the angle it was going in and sample a pixel from my Skybox instead.
Note that the result are the same as what I showed here Real time Water in Panda3d (w/ SSR + Shadows) but now they are fast without cutting corners. HZB is about 10x faster than full resolution SSR. What I need to do now is to clean up all that hardwired code into something presentable.
1 Like
I cleaned up my simple SSR code. I am putting it here in case there is something useful in it beyond what the pre-existing SSR code has. Otherwise I expect it behaves pretty similarly to ninth’s code. It is also glsl which might be useful to some. Ninth’s code is Cg. It was also my starting point for HZB.
Here is the python that calls it:
    manager = FilterManager(base.win, base.cam)
    self.colourTex = Texture()
    self.depthTex = Texture()
    self.normalTex = Texture()
    self.dataTex = Texture()
    quad = manager.renderSceneInto( textures={'color':self.colourTex, 'depth':self.depthTex,
                                    'aux0':self.normalTex, 'aux1':self.dataTex} )

    quad_shader = ShaderCombiner.createGlslShader( ["SSR_simple.glsl"], False, "reflect_shader_SSR_simple", glslversion=430, externals=None, defines=None, has_tessellation=False)
    quad.setShader(quad_shader)

    quad.setShaderInput("colourTex", self.colourTex)
    quad.setShaderInput("depthTex", self.depthTex)
    quad.setShaderInput("normalTex", self.normalTex)
    quad.setShaderInput("dataTex", self.dataTex)
    quad.setShaderInput("skyTex", skybox_texture)
    quad.set_shader_input("mycamera", base.cam)
Below is the glsl shader “SSR_simple.glsl”. I used tobspr’s shaderCombiner but you could equally well extract the VERTEX and FRAGMENT parts into two separate files.
I have verified that it works and its pretty fast. It is not terribly clever deciding how many texels to sample before giving up. There are some useful features like detecting rays that go back to the camera. It also works out what raystep is exactly one pixel so you can choose a multiple of that. I also included the code that defaults to the skybox when SSR are not available. I have noted in the code where I would switch in the HZB code. I have tested it on my water scene. It has the usual artifacts in terms of sawtooth cuts on reflected images and so on. You can make it perfect by doing one pixel at a time but it will slaughter your framerate.
#ifdef _VERTEX_

in vec4 p3d_Vertex;
in vec2 p3d_MultiTexCoord0;
out vec4 l_position;
out vec2 l_texcoord0;

uniform mat4x4 p3d_ModelViewProjectionMatrix;

void main() {
    gl_Position = p3d_ModelViewProjectionMatrix*p3d_Vertex;
    l_position = gl_Position;
    l_texcoord0 = p3d_Vertex.xz*0.5+0.5;
}

#endif

#ifdef _FRAGMENT_

in vec4 l_position;
in vec2 l_texcoord0;

uniform sampler2D colourTex;
uniform sampler2D depthTex;
uniform sampler2D normalTex;
uniform sampler2D dataTex;
uniform sampler2D skyTex;

uniform vec3 wspos_mycamera;
uniform mat4x4 trans_clip_of_mycamera_to_world;
uniform mat4x4 trans_world_to_clip_of_mycamera;

out vec4 color;

void main() {
    vec4 packeddata = texture(dataTex, l_texcoord0); // Reflectance stored here
    color = texture(colourTex, l_texcoord0);

    float Reflectance = packeddata.x;

    if (Reflectance > 0.01) { // Reflects a bit
      // Careful -- depthTex was converted to 0 to 1 from NDC, convert back
      vec4 SurfPosNDC = vec4(l_position.xy,texture(depthTex, l_texcoord0).x*2-1,1);
      vec4 SurfPosWorld = trans_clip_of_mycamera_to_world*SurfPosNDC;
      SurfPosWorld /= SurfPosWorld.w;

      vec3 SurfNormal = texture(normalTex, l_texcoord0).xyz*2-1;

      vec3 rayin = SurfPosWorld.xyz-wspos_mycamera; // un-normalized

      // Reflected ray
      vec3 rayout = normalize(-dot(SurfNormal,rayin)*2*SurfNormal + rayin);

      // Rely on fact that straight lines straight in world space and NDC (clip space)
      vec4 farWorld = vec4(SurfPosWorld.xyz+rayout*10.,1);
      vec4 farNDC = trans_world_to_clip_of_mycamera*farWorld;
      farNDC /= farNDC.w;

      vec3 stepNDC = (farNDC.xyz-SurfPosNDC.xyz);
      vec2 dpix = abs(stepNDC.xy*0.5*textureSize(depthTex,0));
      stepNDC = stepNDC / (dpix.x > dpix.y ? dpix.x : dpix.y);

      if (stepNDC.z > 0) { // step z < 0 => back at the camera -- Abort in favour of skybox
          // Go from NDC (clip) space to uv space
          vec3 rayNDC = SurfPosNDC.xyz+vec3(stepNDC.xyz);
          vec3 rTex = vec3((rayNDC.xy*0.5+0.5)*textureSize(depthTex,0)+vec2(.5,.5), rayNDC.z*0.5+0.5);
          vec3 drTex = stepNDC*vec3(0.5*textureSize(depthTex,0).xy,0.5); // single pixel step

          drTex*=4; // 4 pixel step

          // SSR stepping here (can replace with HZB if depthLODtex available)
          int icnt=0;
          while (icnt < 25) { // 25 is arbirary, can be more careful
              float zDepth = texelFetch(depthTex, ivec2(rTex.xy), 0).x;

              if (rTex.z > zDepth) { // intersect
                  color = mix(color,vec4(texelFetch(colourTex, ivec2(rTex.xy),0).rgb,1),Reflectance);
                  return;
              }
              rTex += drTex;
              if (!(rTex.x >= 0 && rTex.x < textureSize(depthTex,0).x
                    && rTex.y >= 0 && rTex.y < textureSize(depthTex,0).y)) break;
          }
          // SSR stepping here (can replace with HZB if depthLODtex available)
      }

      // use skybox
      // A standard way to map angles to a panoramic texture is atan(y,x) and asin(z) as shown here:
      vec2 skybox_uv = vec2(atan(rayout.y,rayout.x)*0.15915494309+.5,
                            asin(rayout.z)*0.31830988618+.5);
      vec3 skybox_color = textureLod(skyTex, skybox_uv, 0).rgb;
      color = mix(color,vec4(skybox_color,1),Reflectance);
    }
}
#endif
3 Likes