I have a working implementation of “HZB” Screen Space Reflections following
https://sakibsaikia.github.io/graphics/2016/12/25/Screen-Space-Reflection-in-Killing-Floor-2.html
I’d call it “tree based searching” but apparently the common name is Hi-Z Buffers (HZB) from
“Hi-Z Screen-Space Cone-Traced Reflections”, (Yasin Uludag, GPU Pro 5)
The main advantage is no approximations aside from the intrinsic limitations of all SSR. So you trace all rays at full resolution to the edge of the screen and get pretty much no artifacts as a result and still keep a pretty good framerate. The cost is O(log2(height) x height x width ) so pretty tolerable.
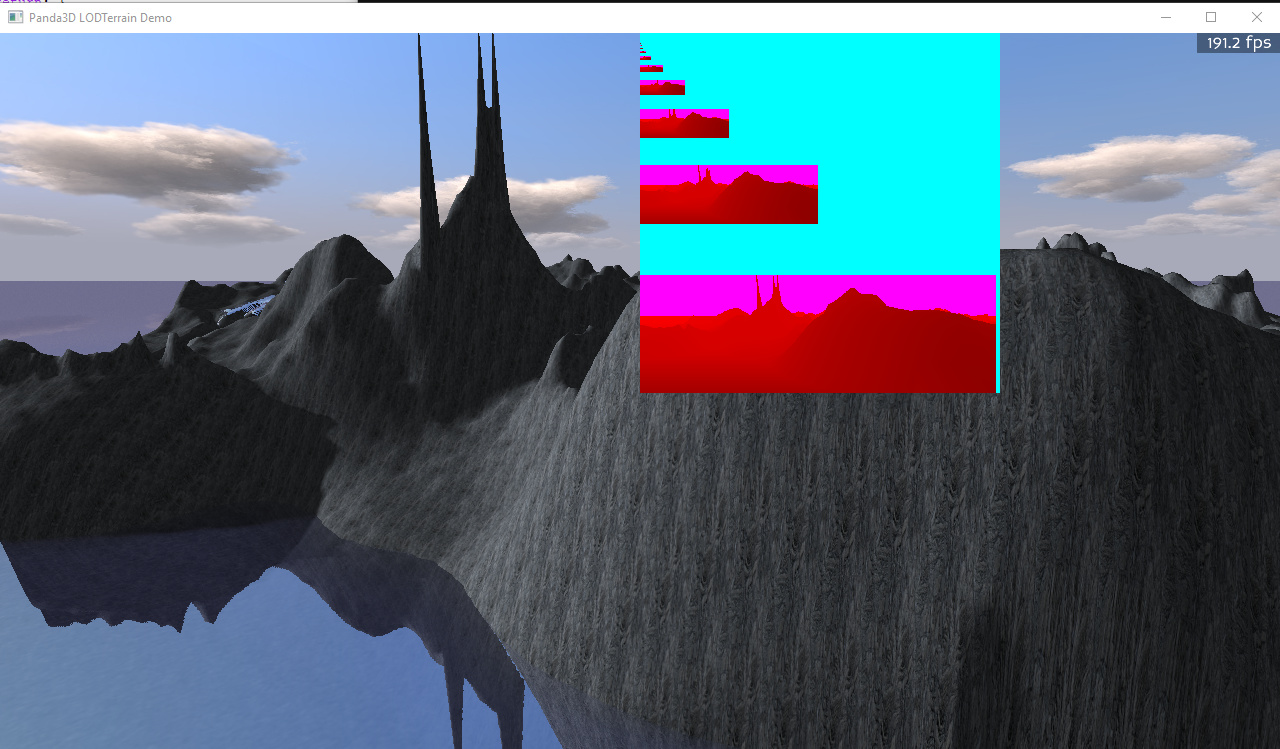
First up – my code is a total hack, I even hardwired the window size into the shader for now - I ended up partitioning a really big texture to make a depth mipmap by hand before I thought to ask how to access mipmaps with Panda. [There is a more or less undocumented version of setShaderInput (see the C++ reference) that lets you do it – thanks rdb.] You can see the big depth texture overlaid on the image above with all its half sized copies. The colouring is arbitrary by me – its just a float r32f texture. So as of writing this is just a proof of concept – you can do HZB in Panda and make it fast
For now I’ll just outline the key parts of the approach:
- I used the filterManager’s RenderSceneInto to capture depth, normal , reflectance and colour information in textures.
At this point you could follow on with any SSR approach including the one above. However, you need to skip a lot of texels or artificially limit the ray length to make it run in a reasonable time which gives you artifacts in the image. I looked at the code by wezu and ninth and see something like 16 texel samples per ray is typical.
Here is a snippet from the start of all the SSR fragment shaders I use (standard and HZB) (glsl):
       // Work in world space initially

        vec3 SurfNormal = texture(normalTex, l_texcoord0).xyz*2-1;

        vec3 rayin = SurfPosWorld.xyz-wspos_mycamera; // un-normalized
        // Reflected ray
        vec3 rayout = normalize(-dot(SurfNormal,rayin)*2*SurfNormal + rayin);
        vec4 farWorld = vec4(SurfPosWorld.xyz+rayout*10.,1);
        vec4 farNDC = trans_world_to_clip_of_mycamera*farWorld;
        farNDC /= farNDC.w;
        // ray step in screen space.  Due to the magic of perspective and NDC,
        // straight lines in world space are straight in NDC clip coordinates
        vec3 stepNDC = (farNDC.xyz-SurfPosNDC.xyz);
The essential feature is working in screen (=NDC =clip) space for your ray march, a trick attributed to these guys:
http://casual-effects.blogspot.com/2014/08/screen-space-ray-tracing.html
- The key to HZB is low resolution versions of the depth buffer that contain the minimum depth for entire regions of the depth buffer. This lets you take really big steps in screen space without missing any intersections. How big? – as big as the whole screen at once in principle. Conceptually its like building a tree out of the depth buffer where each node knows the minimum of all child nodes and the leaf nodes are the texels of the full resolution depth buffer.
I used two shaders to create the smaller subimages using the min of 4 texels each time. I put these images at an offset in the same texture which is very wasteful of the texture image but seems to have no performance cost. The min making shaders are really simple (following the ones in the Killing Floor link but in glsl:).
My level to level min calculating compute shader is here. I used 8x4=32 core work groups because that is a warp size supposedly.
#version 430

layout (local_size_x = 8, local_size_y = 4) in;
layout (r32f) uniform image2D depthLODTex;
uniform ivec2 offset;

void main() {

  ivec2 del=ivec2(1,0);
  ivec2 Coord = ivec2(gl_GlobalInvocationID.x*2+1,gl_GlobalInvocationID.y*2+offset.x);
  ivec2 CoordLOD = ivec2(gl_GlobalInvocationID.x+1,gl_GlobalInvocationID.y+offset.y);
  float z_x00_y00,z_x01_y00,z_x00_y01,z_x01_y01,zmin;
  z_x00_y00 = imageLoad(depthLODTex, Coord).x;
  z_x01_y00 = imageLoad(depthLODTex, Coord+del.xy).x;
  z_x00_y01 = imageLoad(depthLODTex, Coord+del.yx).x;
  z_x01_y01 = imageLoad(depthLODTex, Coord+del.xx).x;
  zmin = min(min(z_x00_y00,z_x01_y00),min(z_x00_y01,z_x01_y01));
  imageStore(depthLODTex,CoordLOD,vec4(zmin));
}
The panda code that uses it looks like this:
node_path = render.attach_new_node("depthshrink2")
node_path.set_shader(compute_shader2)
node_path.set_shader_input("depthLODTex", self.depthLODTex)
...
cn = ComputeNode("compute2")
cn.add_dispatch(iworkx,iworky,1)
node_path2 = node_path.attach_new_node(cn)
node_path2.setBin("fixed",ipriority)
node_path2.set_shader_input("offset", (offset,offset+delta_offset) )
I can attach as many extra compute nodes as I need to build all the subimages and iworkx and iworky get half as big every time until the last one is 1,1. I repeatedly called the shader until I was down to 1x1 pixels. The texture it makes is shown above. Using shaders (even running them 12 times per frame) this step is crazy fast – probably 0.002-0.004 sec total per frame I’d guess. [Note: I am hoping I can replace this monstrosity with a clean set of hand made mipmaps]
The compute nodes all live in the “fixed” render Bin with priorities set to make sure they execute in the right order every frame after the renderSceneInto is done and before the final SSR shader.
-
I made sure each subimage was surrounded by depths with a value of 2 (cyan in the inset above). This is easy – you just clear the depthLODtexture to 2 when you make it. This is why there is +1 offsets in the integer coordinates for the imageLoad and imageStore. This means I don’t have to test to see if I am off the edge of the screen explicitly. If my current depthLODTex value = 2 then I have gone past the edge and can stop. I even went one level past 1x1 in the subimages so I have maxlevel+1 map with all texels=2 on it which catches very low res rays leaving the image.
-
Finally, I use the quad returned from renderSceneInto with a shader that does the SSR ray marching (what comes after the fragment code is above). I used the HZB algorithm/shader code in a very similar form to the code at the killing floor link. Note that the shader code there seems incomplete to me - its more like pseudo code. Going up and down mipmap levels was complicated slightly (for me) by the need to get the offset of that subimage in my big texture. I also tend to use texelFetch not texture because it seems to be faster (in my experience and there are also comments to that effect on the web). I also like using integers to know exactly what texel I am getting when resolution is changing
-
The ray starts at the reflector location (e.g. water surface) on the screen and marches off in the direction given by the stepNDC vector. If my ray misses everything or is directed back at the viewer (delta z < 0) then I find the angle it was going in and sample a pixel from my Skybox instead.
Note that the result are the same as what I showed here Real time Water in Panda3d (w/ SSR + Shadows) but now they are fast without cutting corners. HZB is about 10x faster than full resolution SSR. What I need to do now is to clean up all that hardwired code into something presentable.