Hi folks !
Does anybody know how to apply carton shading on all models but one ?
I’d like to create a little sun, and I don’t want it to have black borders.
Moreover, how to make it “shine” ?
Thank you very much ! 
One way to do that is to apply a BitMask to the camera that is rendering your cartoon shading.
Basically, you’d apply a mask to the camera like so:
acamera.node().setCameraMask(BitMask32.bit(1))And then hide any models from that camera:
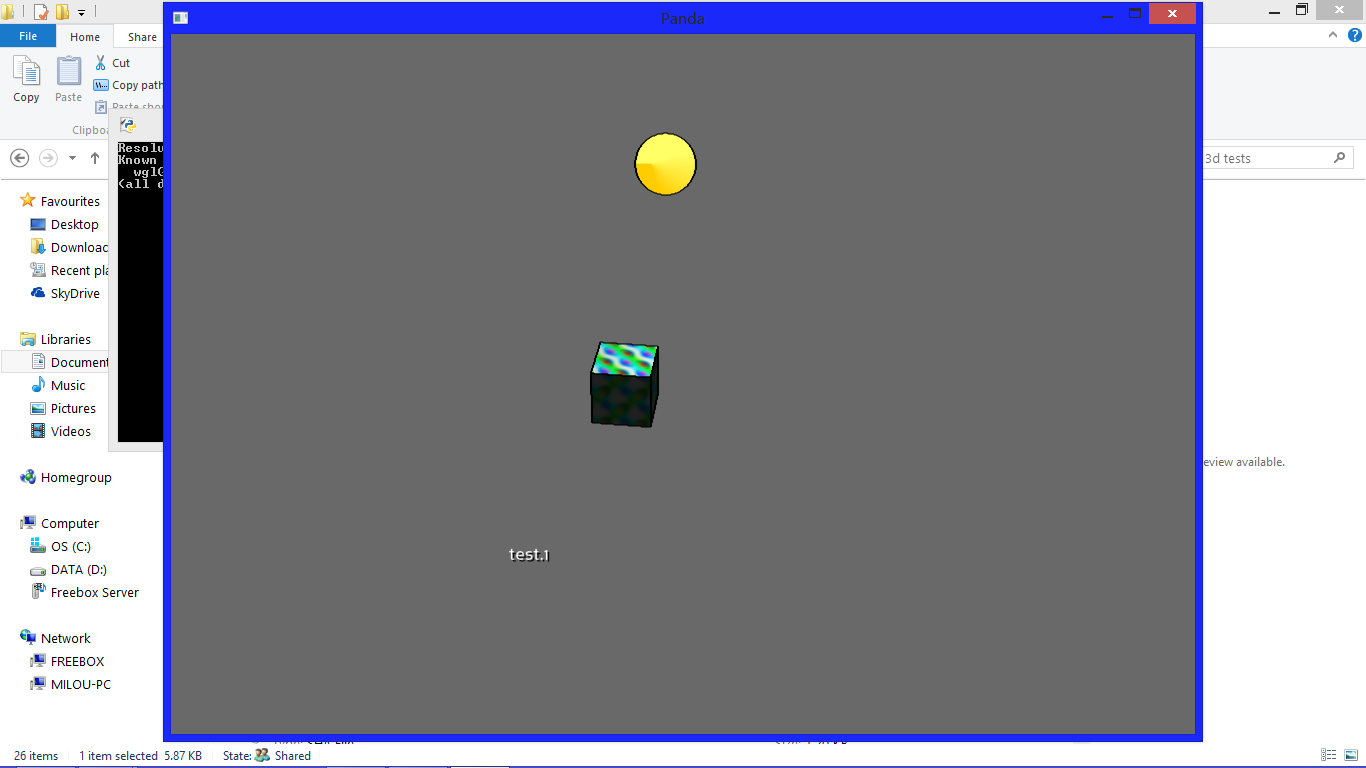
amodel.hide(BitMask32.bit(1))Heres a working example: a copy of the Advanced Cartoon sample with 2 models, and only one shaded.
#Author: Kwasi Mensah
#Date: 7/11/2005
#
# This is a tutorial to show some of the more advanced things
# you can do with Cg. Specifically, with Non Photo Realistic
# effects like Toon Shading. It also shows how to implement
# multiple buffers in Panda.


import direct.directbase.DirectStart
from panda3d.core import PandaNode,LightNode,TextNode
from panda3d.core import Filename
from panda3d.core import NodePath
from panda3d.core import Shader
from panda3d.core import Point3,Vec4
from panda3d.core import BitMask32
from direct.task.Task import Task
from direct.actor.Actor import Actor
from direct.gui.OnscreenText import OnscreenText
from direct.showbase.DirectObject import DirectObject
from direct.showbase.BufferViewer import BufferViewer
import sys,os

# Function to put instructions on the screen.
def addInstructions(pos, msg):
    return OnscreenText(text=msg, style=1, fg=(1,1,1,1),
                        pos=(-1.3, pos), align=TextNode.ALeft, scale = .05)

# Function to put title on the screen.
def addTitle(text):
    return OnscreenText(text=text, style=1, fg=(1,1,1,1),
                        pos=(1.3,-0.95), align=TextNode.ARight, scale = .07)


class ToonMaker(DirectObject):
    def __init__(self):
        base.disableMouse()
        camera.setPos(0, -50, 0)

        # Check video card capabilities.

        if (base.win.getGsg().getSupportsBasicShaders() == 0):
            addTitle("Toon Shader: Video driver reports that shaders are not supported.")
            return

        # Post the instructions.
        self.title = addTitle("Panda3D: Tutorial - Toon Shading with Normals-Based Inking")
        self.inst1 = addInstructions(0.95,"ESC: Quit")
        self.inst2 = addInstructions(0.90,"Up/Down: Increase/Decrease Line Thickness")
        self.inst3 = addInstructions(0.85,"Left/Right: Decrease/Increase Line Darkness")
        self.inst4 = addInstructions(0.80,"V: View the render-to-texture results")

        # This shader's job is to render the model with discrete lighting
        # levels.  The lighting calculations built into the shader assume
        # a single nonattenuating point light.

        tempnode = NodePath(PandaNode("temp node"))
        tempnode.setShader(loader.loadShader("lightingGen.sha"))
        base.cam.node().setInitialState(tempnode.getState())

        # This is the object that represents the single "light", as far
        # the shader is concerned.  It's not a real Panda3D LightNode, but
        # the shader doesn't care about that.

        light = render.attachNewNode("light")
        light.setPos(30,-50,0)

        # this call puts the light's nodepath into the render state.
        # this enables the shader to access this light by name.

        render.setShaderInput("light", light)

        # The "normals buffer" will contain a picture of the model colorized
        # so that the color of the model is a representation of the model's
        # normal at that point.

        normalsBuffer=base.win.makeTextureBuffer("normalsBuffer", 0, 0)
        normalsBuffer.setClearColor(Vec4(1,1,1,0))
        self.normalsBuffer=normalsBuffer
        normalsCamera=base.makeCamera(normalsBuffer, lens=base.cam.node().getLens())
        normalsCamera.node().setScene(render)
        tempnode = NodePath(PandaNode("temp node"))
        tempnode.setShader(loader.loadShader("normalGen.sha"))
        normalsCamera.node().setInitialState(tempnode.getState())

        # Create a mask
        self.cartoon_mask = BitMask32.bit(1)

        # Apply our mask to the normals camera
        normalsCamera.node().setCameraMask(self.cartoon_mask)

        #what we actually do to put edges on screen is apply them as a texture to
        #a transparent screen-fitted card

        drawnScene=normalsBuffer.getTextureCard()
        drawnScene.setTransparency(1)
        drawnScene.setColor(0,0,0,0)
        drawnScene.reparentTo(render2d)
        self.drawnScene = drawnScene

        # this shader accepts, as input, the picture from the normals buffer.
        # it compares each adjacent pixel, looking for discontinuities.
        # wherever a discontinuity exists, it emits black ink.

        self.separation = 0.001
        self.cutoff = 0.3
        inkGen = loader.loadShader("inkGen.sha")
        drawnScene.setShader(inkGen)
        drawnScene.setShaderInput("separation", Vec4(self.separation,0,self.separation,0));
        drawnScene.setShaderInput("cutoff", Vec4(self.cutoff,self.cutoff,self.cutoff,self.cutoff));

        # Panda contains a built-in viewer that lets you view the results of
        # your render-to-texture operations.  This code configures the viewer.

        self.accept("v", base.bufferViewer.toggleEnable)
        self.accept("V", base.bufferViewer.toggleEnable)
        base.bufferViewer.setPosition("llcorner")


        self.character = loader.loadModel('box')
        self.character.reparentTo(render)

        self.character2 = loader.loadModel('box')
        self.character2.reparentTo(render)
        self.character2.setX(10)

        # Hide character2 from the normal camera
        self.character2.hide(self.cartoon_mask)


        self.character.hprInterval(15, Point3(360, 0,0)).loop()
        self.character2.hprInterval(15, Point3(360, 0,0)).loop()

        # these allow you to change cartooning parameters in realtime

        self.accept("escape", sys.exit, [0])
        self.accept("arrow_up", self.increaseSeparation)
        self.accept("arrow_down", self.decreaseSeparation)
        self.accept("arrow_left", self.increaseCutoff)
        self.accept("arrow_right", self.decreaseCutoff)

    def increaseSeparation(self):
        self.separation = self.separation * 1.11111111;
        print self.separation
        self.drawnScene.setShaderInput("separation", Vec4(self.separation,0,self.separation,0));

    def decreaseSeparation(self):
        self.separation = self.separation * 0.90000000;
        print self.separation
        self.drawnScene.setShaderInput("separation", Vec4(self.separation,0,self.separation,0));

    def increaseCutoff(self):
        self.cutoff = self.cutoff * 1.11111111;
        print self.cutoff
        self.drawnScene.setShaderInput("cutoff", Vec4(self.cutoff,self.cutoff,self.cutoff,self.cutoff));

    def decreaseCutoff(self):
        self.cutoff = self.cutoff * 0.90000000;
        print self.cutoff
        self.drawnScene.setShaderInput("cutoff", Vec4(self.cutoff,self.cutoff,self.cutoff,self.cutoff));

t=ToonMaker()

run()
Regarding a sun, why does yours have black borders? Even a plane with a sun texture shouldn’t do that?
One other way would be use a Glow shader - there are samples around about that.
Alternatively, a lens flare might suffice. Ninth’s code snippet here is quite good for that:
Thank you very much !!!
I’ll have a look 
To answer your question, I want to turn a sphere into a little sun, that’s why it has black borders.
Thank you again !
Hey !
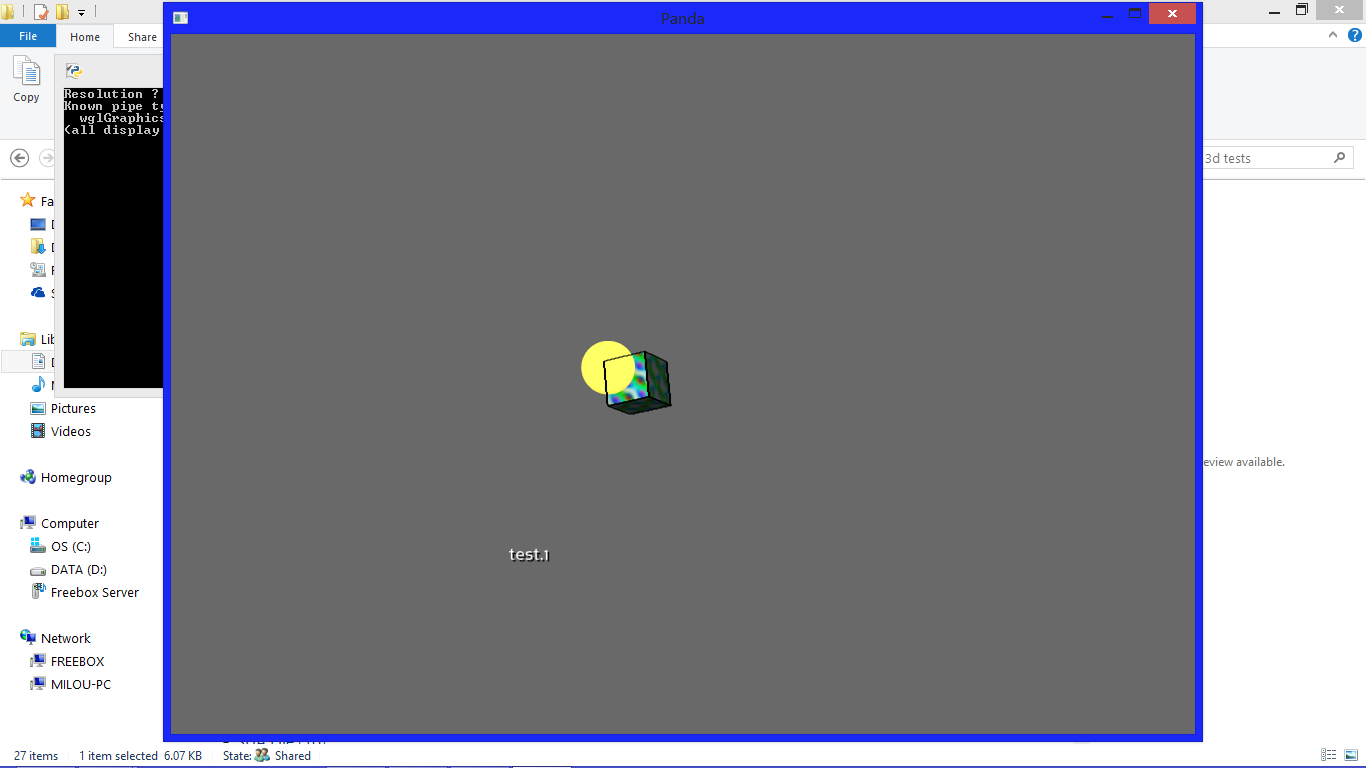
I tried what you said… with the hiding of the sphere, there are indeed no black borders, but it is transparent 
And I cannot turn glow shader on, because it applies to ALL my models (cube + sphere)…
How to apply carton shader to my cube and glow shader to my sphere, without mixing them?
Is there something like “glowshader.reparent to (sphere)” and “cartoonshader.reparent to (cube)”.
Thank you very much 
Here are some screens of my shots :