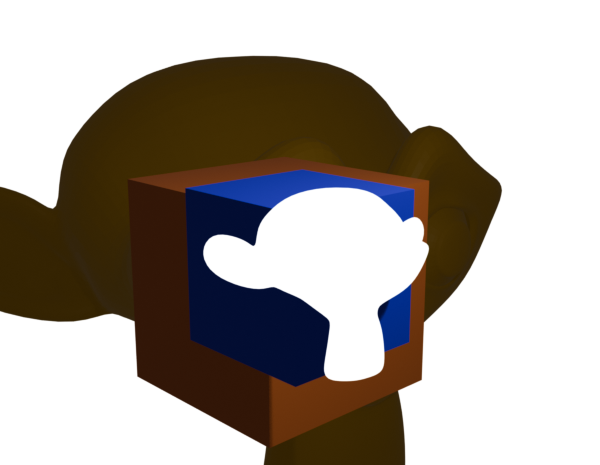
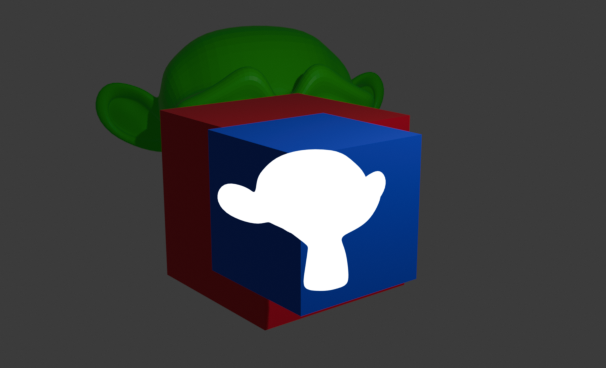
Transparency Holdout

Good morning!
I’m having a bit of a problem figuring this out. It’s something that used to happen a lot as a glitch, but now I can’t seem to replicate it.


I would like to try and replicate this in Panda. Where, an object with transparency in front of an object occludes that which is behind it. Essentially creating a Holdout effect. How might I go about doing this?

As always, thank you for your input in advance!

Such tricks are performed with the help of a stencil buffer.
https://docs.panda3d.org/1.10/python/programming/render-attributes/stencil-attribute

1 Like

You could also, I daresay, simply have the object in front be rendered before the object behind (via use of a culling-bin of the “fixed” type).

Since the object in front should still render to the depth-buffer, despite being transparent, the object behind should go un-rendered where the object in front “occludes” it.

For more information on controlling the order in which things render, see this manual page:
https://docs.panda3d.org/1.10/python/programming/rendering-process/controlling-render-order

2 Likes

What @Thaumaturge describes (which is the way I’d do it too) is how the glitch usually happens too: it’s when a (mostly) transparent object in front is rendered first, writing itself to the depth buffer and then preventing the next object (which may be behind) from writing its fragments to the framebuffer.

When you call setTransparency in Panda, that puts it in the bin of objects rendered after the opaque objects, and renders all transparent objects back-to-front, to try and prevent this. It goes wrong when Panda can’t properly separate the objects (eg. if they are overlapping).

2 Likes

I think the topixstarter was misunderstood, transparency is not what was meant. He meant an invisible object.

To understand this, you need to be familiar with the term - holdout

https://docs.blender.org/manual/en/latest/render/shader_nodes/shader/holdout.html

1 Like

No, I understood I believe–transparency (combined with render-ordering and the depth-buffer) is here just a means of creating such a “cutout” effect.

1 Like

Then I’m not sure how the alpha channel will be added to the final image. In a blender, it looks like this.


result:
result
The final image can be used as a frame.
result1
In this screenshot, it is clearly visible, open the image in a graphical editor and you will see how the alpha channel and background color are combined.

1 Like

I’m not sure of your setup in Blender, or how it handles things, but in Panda basically, what can be made to happen is this:

  • First, the “cutout” object is rendered–but rendered as fully transparent. As a result, the background colour is rendered to the output buffer. At the same time, naturally, the object’s depth-information is rendered to the depth buffer.
  • Second, the other object–the one that’s supposed to have a “hole”–is rendered, in the normal way. This renders its colour to the output buffer.
    • However, because it’s further from the camera than the “cutout” object, its depth-values are higher. As a result, wherever the “cutout” object was rendered, the standard depth-test prevents this second object from being rendered; that is, it’s only rendered where the “cutout” object was not rendered.

As a result, the second object is rendered, and a patch of background colour is shown where the “cutout” object is located.

Going back to your example from Blender, it may be that Blender has a final pass in which it renders background colour. I note that the “cutout” effect works as expected in the second of your screenshots, but not in the final rendered–where it still shows the background colour of the second image.

In Panda, one needn’t perform a final background-rendering pass, and so this needn’t be a problem.

1 Like

The essence of the Holdout effect is that it is not the object that should have a cutout, but the final image, that is, the buffer.

1 Like

But that is exactly what happens: the object itself is unchanged–only the final rendering is changed.

1 Like

I’m still not sure if the alpha channel in your approach arises on its own. At the same time, manipulating only writing to the color buffer and to the depth buffer.

The final rendering should contain alpha transparency in place of the cut object, how this is achieved by manipulating the color buffer and depth buffer in your example is not clear.

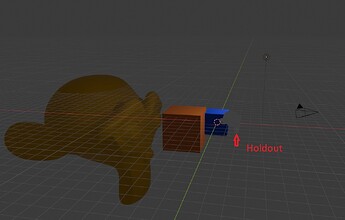
The third screenshot shows the Holdout effect. If you do pay attention, then there is an alpha channel cutout in place of the object.

1 Like

The thing is, a render in Panda generally doesn’t have a transparent background. It’s usually opaque.

However, if the clear-colour were to contain 0 alpha, then I would imagine that this technique would indeed produce a transparent cutout, as it would show the backdrop–in that case transparency–in the cutout region.

Put it this way:

  • At the start of the frame, with a clear-colour that’s transparent, you have a buffer that contains pixels with an alpha of zero.
  • Then we render the “cutout” object, while–being transparent–doesn’t change the colour-buffer–but does change the depth-buffer.
  • Then we render the “solid” object, which changes both the colour- and depth- buffers–but only where it passes the depth-test, which it won’t where the “cutout” object was placed.

Thus we end up with a transparent hole in the middle of the “solid” object.

Here below is a short program that demonstrates this. Press “space” to record a screenshot, which you should find has a transparent background and hole.

from direct.showbase.ShowBase import ShowBase

from panda3d import __version__ as pandaVersion
print (pandaVersion)

import sys
print (sys.version)

class Game(ShowBase):
    def __init__(self):
        ShowBase.__init__(self)

        self.setBackgroundColor(0, 1, 0, 0)

        obj1 = loader.loadModel("panda")
        obj1.reparentTo(render)
        obj1.setPos(0, 25, -7)
        obj1.setBin("fixed", 0)

        obj2 = loader.loadModel("smiley")
        obj2.reparentTo(render)
        obj2.setPos(0, 15, 0)
        obj2.setColorScale(0, 0, 0, 0.01)
        obj2.setTransparency(True)
        obj1.setBin("fixed", 1)

        self.accept("space", self.takeScreenshot)

    def takeScreenshot(self):
        self.win.saveScreenshot("test.png")

app = Game()
app.run()

The only caveat is that if the “cutout” object’s colour-scale is set to have an alpha of “0” (or indeed, below a certain threshold), it doesn’t seem to be rendered at all. Hence my setting the alpha above to “0.01”. I don’t know offhand if there’s a way to disable this behaviour–but I’d be very unsurprised if there was!

But otherwise, you should find that this produces a screenshot with a transparent cutout in the middle of a solid model!

(I tried embedding the rendered screenshot, but it looks like transparency doesn’t show up on the forum. Just run the program, and you should see!)

1 Like

This is not a full-fledged Holdout effect, because the background color is lost. It is easier to use a shader if the creator of this theme requires the same shader as in blender.

1 Like

I mean, it’s still there–it’s just transparent.

But fair: I didn’t realise that you wanted there to be transparency only in the cutout region. That would indeed be trickier.

But then, let me note that the original poster didn’t ask for the effect that you showed in Blender–they asked for a way to (intentionally) replicate the effect that I showed above.

1 Like

Note that he designated it as Holdout effect, which refers to 3D editors, as this term comes from the compositing process.

1 Like

They said “essentially a holdout effect”–so not necessarily an actual holdout effect, but something that is similar at heart–and specifically said that they wanted to try to replicate the transparency bug intentionally.

So, to my reading, that means that achieving the effect of the bug, and the effect described in the first post, is more important than matching an actual holdout effect, which was mentioned for reference as a similar effect.

1 Like