Textures I apply on my own exported model takes majority color

Hi all,

I have 2 plane models, one of them (map.bam (2.3 KB) ) I exported from Blender 2.9 (I did UV unwrap, if I should’ve done anything else please let me know), tried using setTexture(myTexture,1) and I get a full-black image, I’ve used other models before and I have realized that it takes one color from the texture.

I also have another plane model, this time it’s downloaded from an external source. water.bam (1.1 KB) and textures applied onto this seem to work fine.

How should I be exporting my models without running into this problem? I use blend2bam.

It sounds as though your UV-map is occupying just one corner of your texture; perhaps the UV-coordinates are all (0, 0), or some such.

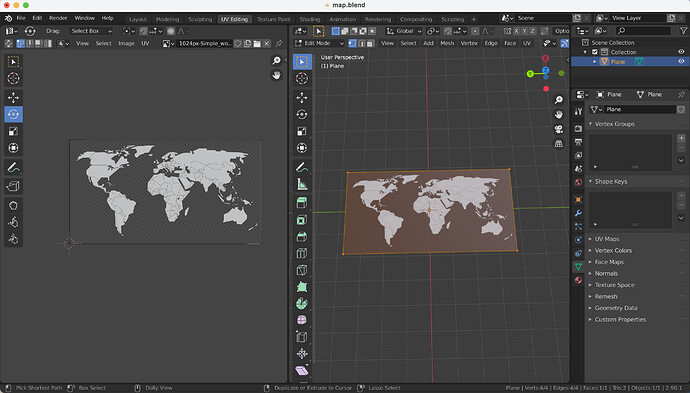
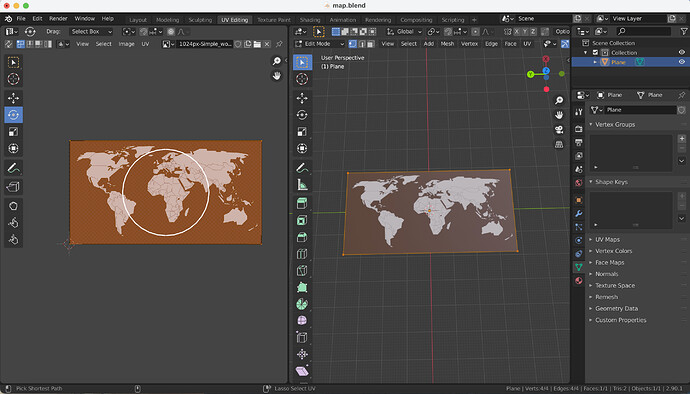
I don’t use blend2bam, so I’m not in a position to help there, but if you show your UV-mapping from Blender I might be able to comment on that.

1 Like

Hmm… Odd! Granted that I’m not familiar with that version of Blender, that UV-mapping looks fine to me.

What happens if you apply a texture in Blender and export the model with it? Does it show up correctly in your program? It not, does it show up correctly in PView?

1 Like

It does and works properly, when I look at the egg-file version of the model it seems that the texture is embedded into the code, so when I try to load it, the textures probably do play a role in messing things up here. Plus it should also work when I add the second parameter to setTexture() as I believe it overwrites the current texture and replaces it.

But even when there is no texture applied onto the Blender model, it still takes up one color, I’ll experiment UV unwrapping with no texture applied once again momentarily.

Okay, loading your model in a program of my own, it very much looks like there’s a problem with the UV-map.

And indeed, I think that I may have found the problem!

If I convert your bam-file to an egg-file and open it up, I see that your UV-coordinates seem to have a name specified. (It’s the zero that comes after “<UV>” and before the first curly-bracket.)

If I remove this entirely from all UV-entries, then the UV-map seems to work.

Between this and a look at the egg-syntax page in the manual, I’m hypothesising that applying a name to a UV-map causes it to be used for a texture only if that texture specifies it by name as the UV-map to be used.

Now, when you export with a texture, this is, I imagine, set automatically.

But of course when you apply a texture in code, no such thing happens.

With the texture specifying no UV-map, the default is used. But since your only UV-map is named, it’s not the default UV-map, and so it’s not the one that’s used. Presumably in this case Panda falls back on a default UV-mapping of (0, 0) for all vertices, and this is what’s used.

As a result, rendering finds all of the object’s surface to map to approximately (0, 0), and whatever colour is located there is what ends up everywhere.
1 Like

When you use setTexture without a TextureStage, it applies the default TextureStage, which does not use custom named texture coordinate sets.

Use findTextureStage to grab the existing texture stage, then use that to override the texture.

2 Likes

Alright, thanks @rdb @Thaumaturge

1 Like

I get 4 texture stages when using findAllTextureStages, is that expected? I thought I only had 1.

panda3d-gltf uses the below PBR stages/maps (creating default/fallback textures as needed), which makes it easier to write custom shaders such as those used by simplepbr.

  • Base color
  • Occlusion, roughness, metallic
  • Emission
  • Normal
1 Like

Oh that makes sense, thanks a lot :slight_smile: