I’m happily using Panda3D from 1 year now and I like it a lot
Now I have a small issue with transparency, I think it should be easy to solve but I lack the required knowledge.
I have a few flat ‘ribbons’ (all have zero Z) overlapping / com-penetrating each other. They all have the same color, only alpha is changing along with the distance from a point. The goal is to have a simple fading effect: the higher distance, the more transparent the ribbon is, until it completely fades away.
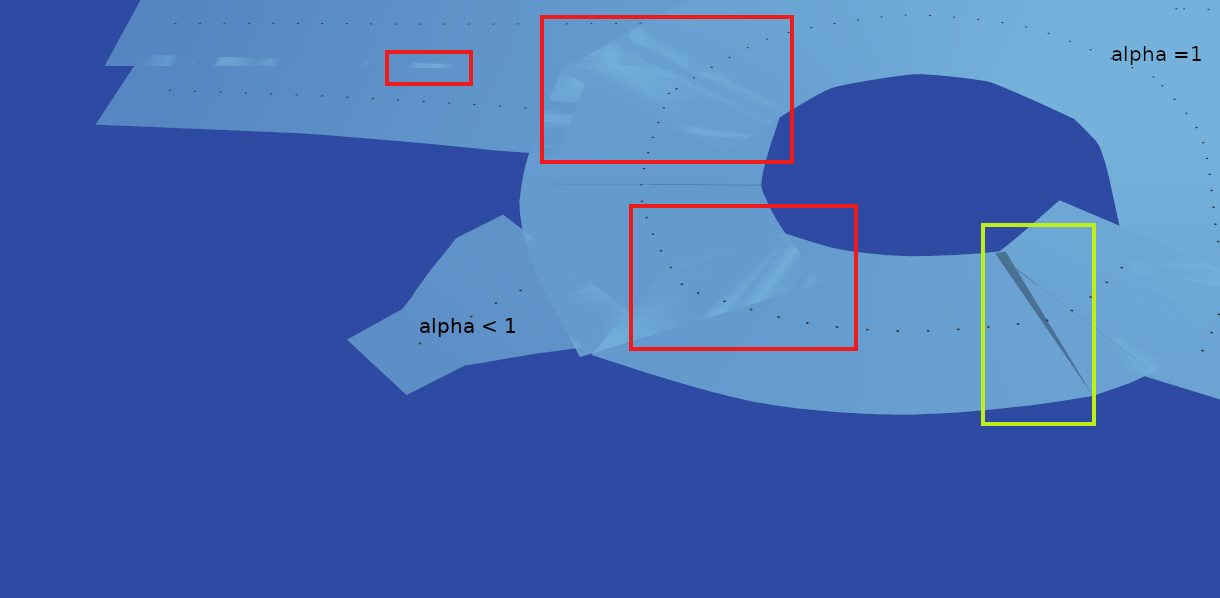
It works ok, but in the overlapping parts the color is brighter and it flicker like in the picture below: red regions not ok.
My goal is to ‘fuse’ the ribbons together so that it looks like a unique surface and the color changes smootly; the overlapping regions not visible.
The ribbons are generated at runtime from a live datastream I have no control on. I used GeomTriangles and GeomVertexData to create the geometry; color and alpha are assigned to each vertex.
but it seems that only the rgb part was having effect while the alpha part was not having any visible effect.
I also tried the DecalRenderAttrib again with no visible differences.
As a bonus, I’d like those ribbons to be able to ‘receive’ shadows from other objects over it, but not to cast shadows themselves: yellow region in the picture.
Hmm… it’s odd that the overlapping regions are brighter than expected. If I may ask, could you show us the code that sets up these objects, please? Specifically, anything that alters how they’re rendered (e.g. making them additive, or disabling depth-testing, etc.)
In general:
Transparency can get tricky when transparent objects may interpenetrate. You see, standard transparency depends on having its elements rendered from furthest to nearest–if they’re not, one can end up with unexpected results. Panda3D does by default automatically sort transparent objects for this reason, I do believe–but it sorts objects, not each pixel, meaning if it’s possible to have some parts of an object behind and other parts in front of some other object, the results again might not be as expected.
This can be further complicated by depth-testing: if a more-distant object is rendered after a less-distant one, depth-testing may result in it not being rendered at all. Now, one can disable depth-testing for specific objects–as long as doing so doesn’t cause other problems.
One fairly easy solution–as long as the results are suitable to your intentions–is to render your transparent objects additively. With additive rendering, the order in which objects are rendered no longer matters, allowing both for interpenetration and unsorted objects.
Otherwise, depending on your specific situation, there might be other blending modes (such as the “max” blending-mode) that work for you.
thanks for your reply.
I’m trying to create a minum example to reproduce the effect.
In the meanwhile, I can answer you the options I use on each ‘ribbon’ are the following:
I think that Panda is doing a good job trying to achieve a correct real-world result.
I agree that using something like the ‘max’ blending should provide the result I want, but I was not able to achieve it.
but while modifying the first three params did produced visible changes, modifying the latter three did not produce any visible effects. Seems like they were ignored. Shall I do something to enable it? Like calling set_transparency( 'something') or other ?
Part of the reason that the last three parameters seem to be ignored may simply be that the “max” blending-mode doesn’t actually use any parameters aside from the blending-mode itself, so the last two parameters at least should be ignored, I believe.
That said, if the “max” blending-mode itself is being ignored, I’m not sure of why that is. It might be that the use of additive blending for the RGB channels (as you’re specifying by the first three parameters there, I believe) is resulting in it being ineffective–but I’m really not sure.
Have you tried “simple” max-blending, without separating the RGB and alpha channels, such as shown below?
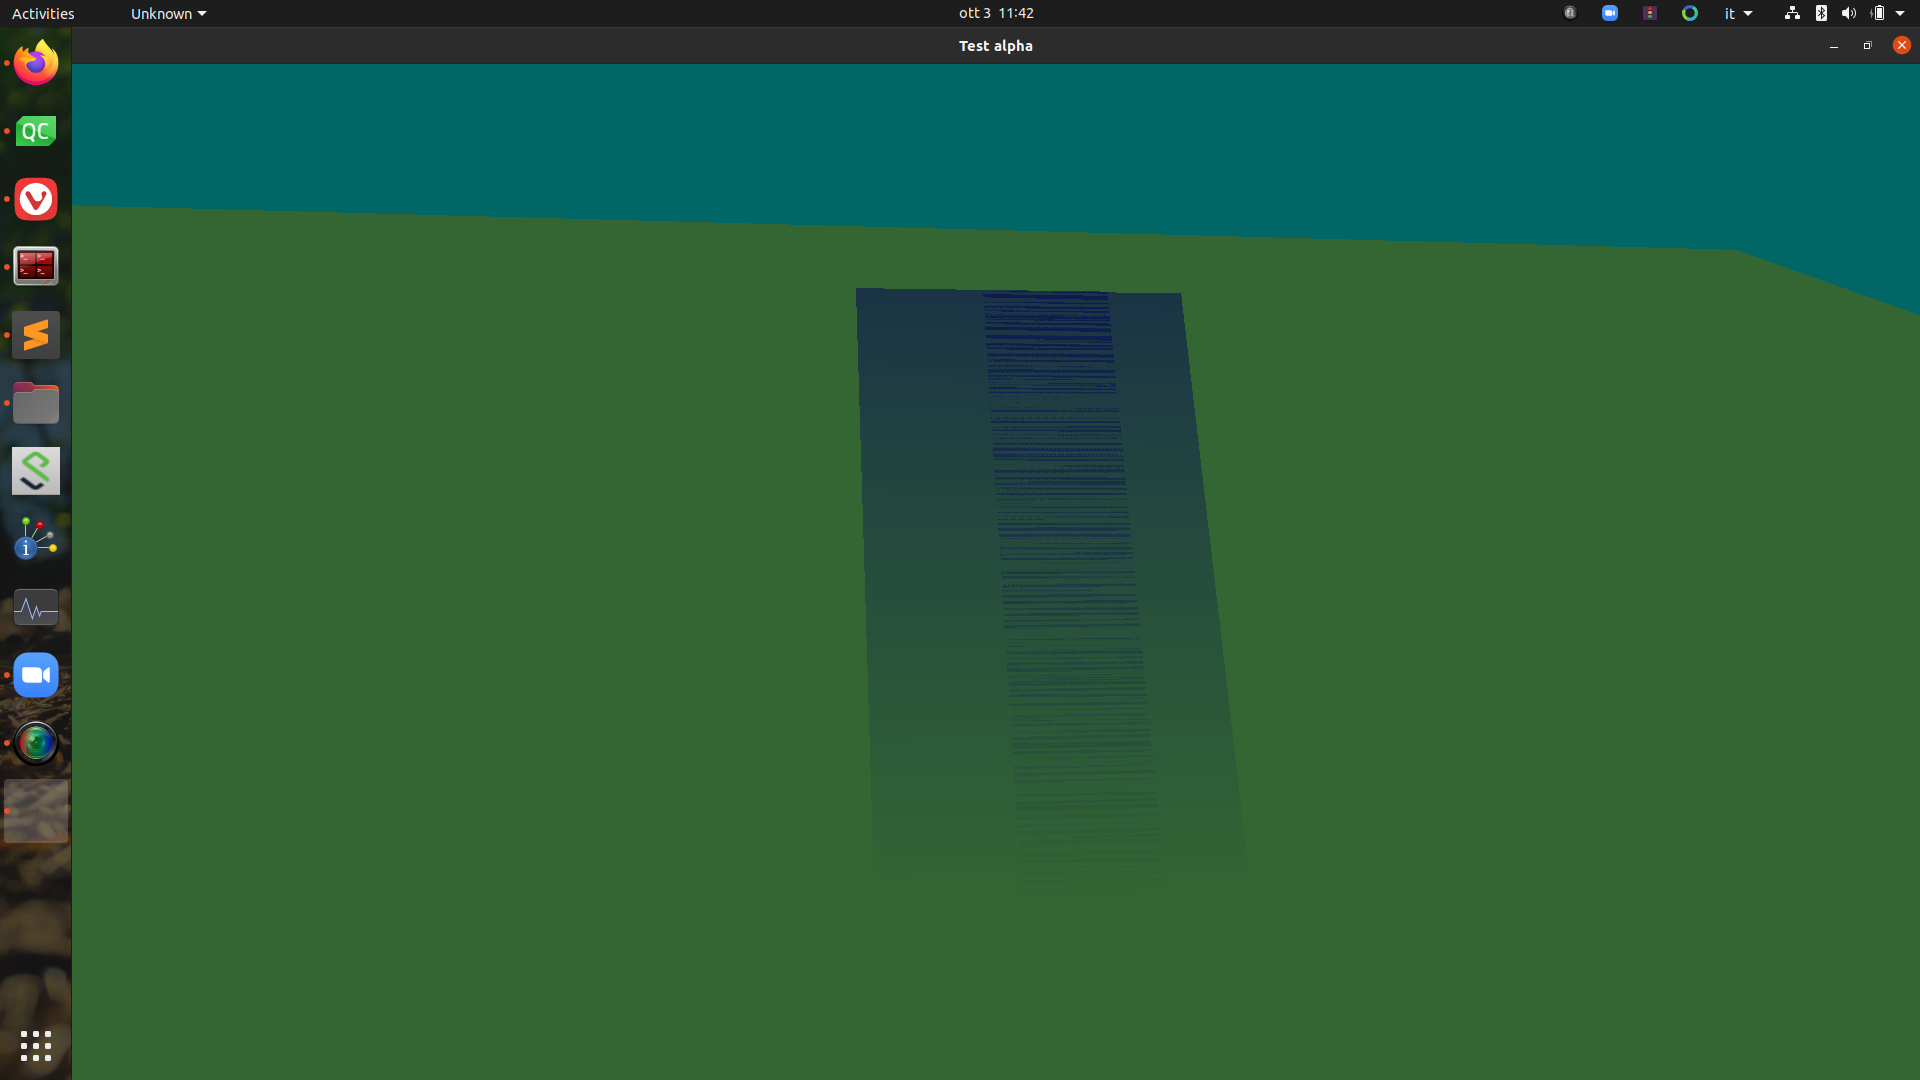
Hi, sorry for my huge delay. I have a minimal example to reproduce most of the elements and settings I have in my scene.
After turning a bit the camera, the result is as shown in the picture.
By pressing ‘r’ key, it’ll toggle different blending mode between none, add, max and min.
My goal would be to get rid of those darker lines when the 2 ribbons overlaps, keeping the gradual alpha along the longer dimension.
Looking at the screenshot, what I see there looks like depth-fighting to me.
That is, it looks to me that the two ribbons occupy more or less the same space for some or all of their extent, and as a result the standard depth-test is going back and forth on which of them is closer for a given fragment.
What happens if you disable depth-writing (or -testing) for your ribbons, and then try the various blending modes?
(I fear that I’m not set up properly for C++ building, so I haven’t tried it myself.)
Yes, it’s a problem with the depth buffer. Sorting will help if the camera direction does not change, if it changes, it will not work.
I do not know how to disable depth recording via DepthTestAttrib for Geom by analogy with set_depth_write(False) for NodePath. Maybe there is someone else who has gone through this.
add:
This will correct the flicker, but the effect of multiplying the color will remain.
I think it’s unpredictable. There is an option with a stencil buffer, but it will be very cumbersome. You can still mess around with mixing operands, but I haven’t thought about these things for 10 years, I just remembered today.
The easiest option is to apply a Z offset for each Geom, but if the camera is static.
Well, it depends on what effect, precisely, Alberto is looking for, I would say.
I know for example that I’ve used MMax (I think that it was) quite successfully to similarly handle interacting gradients–but my case may not match theirs.
Aah, right, of course–because the background has an alpha of 1, which is (presumably) always greater than or equal to the alpha of the gradient.
In my case I was blending not alpha, but colour (which was later being turned into alpha in a shader).
Well, that is perhaps one potential approach: switch the gradients from alpha to colour, render them to an off-screen buffer, and then composite the result over the actual scene, treating the final colour as alpha.
The easiest option is to apply a Z offset for each Geom, but if the camera is static.
well, I’ll need to use Z offset to draw other thing over these ribbons (see later), and I can have like a hundred of them, I don’t want to mess around too much with Z offset.
The most correct thing would be to unite the neighboring vertices of the plane.
I agree, my problem is that those ribbons are generated at runtime by another piece of software, from data got from a ‘real life’ sensor, so I don’t know how many I have of them, nor their shape, beforehand. They change over time, some are overlapping, some not. I don’t know how to ‘fuse them’ in such a dynamic environment.
yes! you got me!
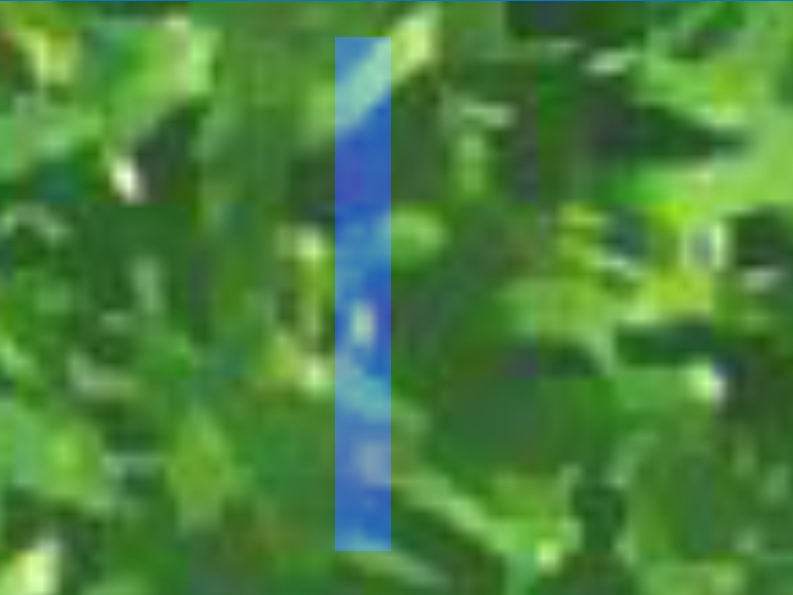
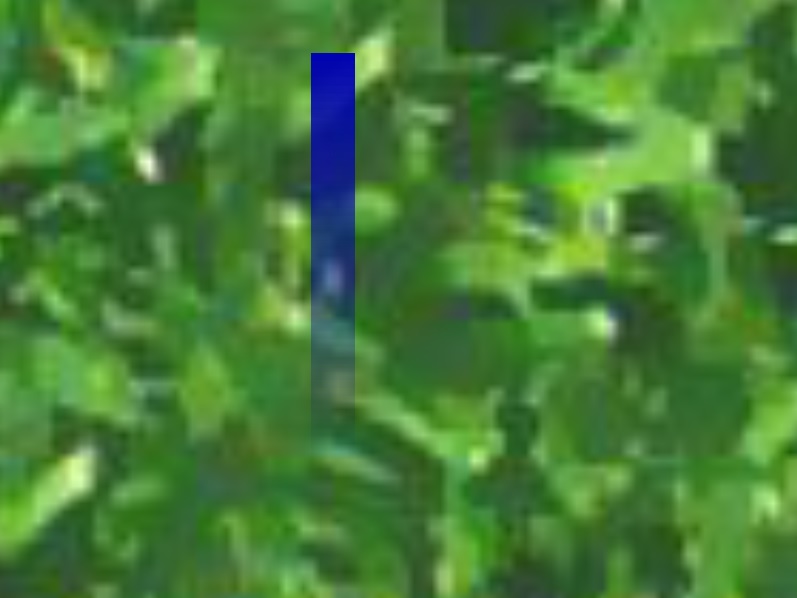
The goal is having something like ‘a single bigger ribbon’, like in the second picture proposed by serega-kkn. The alpha is proportional to a distance from a certain point, so 2 pixel overlapping must have the same alpha value. That’s why multiplying or adding is not correct for me. max would be ok for me, if it could take into account only the ribbons.
To give a reference, I’d like to have a situation like in this picture, with my ‘ribbons’ are the tracks.
In my case I have many of them crossing each other, and fading with distance. On the tracks there are objects, the other balls, obstacles, the ball’s trail and so on.
I can draw all of this, my only problem is that when the one track crosses another one, and the alpha is not 1, I have those strange effects. I’d like to have the fading effect smooth.
yes, setting ‘max’ I got a full opaque color.
I’m sorry, but I’m a newbie to coloring and blending. If I understand correctly, the blending will have effect on everything is on the scene. Can the blending be associated only on the ribbons? blend ribbon 1 over ribbon 2, but not on the background?
Like ribbon_1.blend_on(ribbon_2) // just to give the idea
If I got your tip, it’ll be like creating a new scene with only my ribbons, blend them, then get the result and put it into original place in my real scene? Just to be sure, I have many many other things on my real scene, mostly ‘over’ my ribbons, which are the this is just a simplified example. Will this work without affecting the other objects in the scene?
Can you point me to an example about how to do it?
NOTE: those ribbons needs to ‘receive’ shadows cast from objects over it, like the shadows of the balls in the piscture. The ribbons do not cast shadows themselves.
NOTE 2: I’m using the alpha because it is simple to do, but if there are other approach to realize this fading effect, tell me.
Sort of. It will apply to only those nodes to which it is applied, and any nodes below those (if not overridden)–but the end-result will be affected by whatever else is in the scene.
This is pretty much what I’d suggest, indeed.
In short, I’d suggest rendering your ribbons with a separate camera, and applying to them a shader that renders the appropriate alpha-value as an opaque colour-value. (Since the calculation should produce pretty much the same value regardless of the ribbon, there should be no need for blending.)
This would then be composited with the final scene in another shader.
Now, I see two approaches to handling the matter of other objects occluding your ribbons:
You could keep your ribbons in a separate scene-graph, apply the result to a full-screen quad, and then use the rendered depth-values to determine whether to render out a ribbon-pixel or a pixel from another object.
This is, I think, likely to be more efficient, but also more complex to implement.
You could keep your ribbons in the same scene graph as everything else, and render the scene twice, producing two off-screen textures: once for the ribbons, with everything else being rendered as a solid colour, and once for everything else, with the ribbons being rendered as a solid colour. Similar to the above, these two results would then be applied to full-screen quads, one each, and composited via another shader, which simply renders pixels based on which of the two textures has the solid colour.
This might be more straightforward to implement, but may also be less efficient.
I think I understand what I should do, but it’s still hard to me understand how to do it, because my skills are too poor right now. My background is embedded software, I never wrote shaders, and I still have hard time understanding the details about how they work and interact with buffers and so on.
That’s fair! We all start off not knowing these things after all, I daresay, and sometimes such things look intimidating from the outside, I fear!
Honestly, it’s not a field in which I feel sufficiently experienced myself that I feel confident in recommending for or against a particular starting point. ^^;
One caveat that I will mention is that at least some of the samples–the Toon Shader sample included–use Cg, which I believe is deprecated. I’d suggest instead using GLSL.
(That said, with regards to the lists of engine-provided shader inputs given in the manual, note that those listed for Cg are also available for GLSL, so both lists are valid in the latter language.)
Looking at the samples, it seems to me that you’d be looking specifically at the “advanced” Toon Shader sample (the “basic” one using CommonFilters rather than a custom shader, I believe).