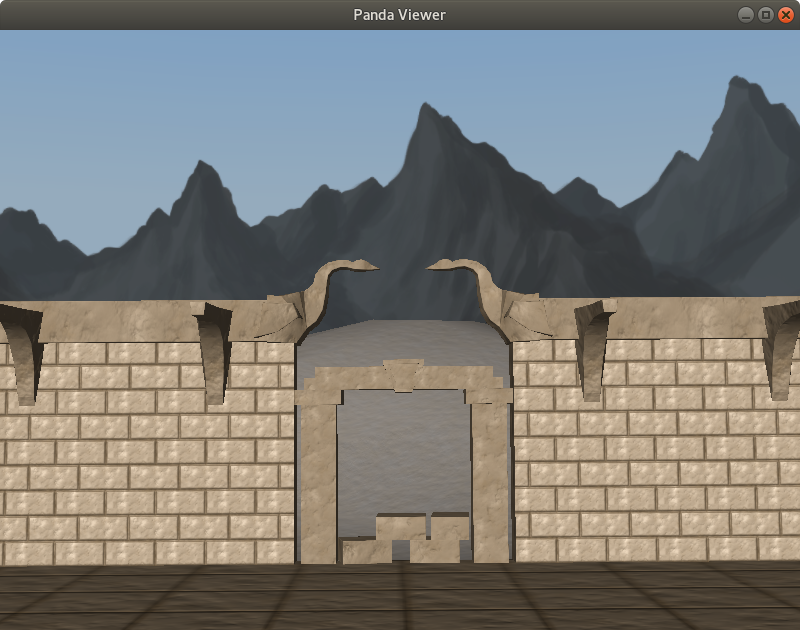
I’ve uploaded the models that I made–the desert environment, the “simple enemy”, and the “laser” and associated “hit-flashes”–to a new repository, for others to use.
On a related note, I’ve just realised that I haven’t included in my tutorial repository the various models, sounds, fonts, etc. used in the tutorial. Since not all of these are mine, I don’t know whether it’s acceptable to do so.
So, what I think that I’m going to do is this:
For the models that I made myself, I’ll link to the repository that I just posted.
For the sounds that I made myself, and the one sound contributed by a friend of mine, I’ll include them in the tutorial repository and link to the relevant repository folder.
For Panda-chan, I’ll link to @wezu’s repository, above. (With a note to decompress the “.pz” file, since I haven’t looked into getting the build-system to handle that automatically.)
For the font and music, I’ll link to my sources for them.
And I’ll modify the license document to reflect the fact that various files are no longer present.
I haven’t enabled shadows in the tutorial, no. This is simply because I’m using a DirectionalLight for the primary lighting in the game, and while I gather that it is possible to produce shadows from such a light, it’s not simple, making it problematic in a “beginner’s tutorial”.
I did originally use a Spotlight so that I could indeed use Panda’s out-of-the-box shadows, but I felt that the light cast by it was a poor fit for the game.
Using shadows with directional lights isn’t really very difficult; the trickiest part is fitting the frustum around the scene, but Panda can do this automatically with 5 lines of code, see here:
Hmm… It’s short, but I’m not sure that I want to explain the film offset, film size, tight bounds, etc. to a beginner. However, I intend to give this further thought, and take another look at my lesson on lighting…
And it’s done! The final set of lessons has been uploaded!
I am a little dissatisfied with the length of my DirectGUI lesson: it’s awfully long. I’ve considered splitting it up, but a lot of its size comes simply from code, and I don’t feel that the elements introduced along the way really call for separate lessons. Still, maybe it’s worth considering, depending on reader feedback.
Still, over all I think that I’m happy, and intend to post this elsewhere, too.
[edit]
PS: Thank all of you here who have given help or feedback on the tutorial! It has helped, I do believe.
[edit 3]
I’ve put in a slightly better (I hope) “About” page, which should show up on the “Home” page, and which should link to the start of the tutorial. The “Home” page: https://arsthaumaturgis.github.io/Panda3DTutorial.io/
Hey Thaumaturge, welldone! I just started to try out your tutorial. Can you make every lesson a folder with full code and assets in github? Paths for assets are somekind of confusing for new learners imho.
I just do not understand why it was necessary to separate the model and the code?
It could be done so that when you click “Clone or download”, getting a ready-made working folder.
In addition, it was point out to me that I neglected to link to the “ReferenceCode” folder that I mentioned in the “start here” page. I’ve done so now. For the sake of convenience, let me link to it here, too:
That folder contains one folder per lesson, with each folder containing the source code (but not the assets) for the project as of the end of that lesson.
It was intended to be available for, well, reference during the tutorial, but I missed the fact that its location wouldn’t be obvious given the manner in which I’ve hosted the site! Sorry about that! ^^;
There are a few thoughts here, I think.
First, the “ReferenceCode” directory contains one folder per lesson, with the code reflecting the state of the project as of the end of that lesson. Including the assets in these folders would mean duplicating them a number of times, which I’m loath to do.
Second, not all of the assets are mine. Indeed, only the ones that @serega-kkz linked to just above are. While it might be okay to include some of the others in my repository, I’m not confident that it’s okay in all cases. (And come to think of it, since these are all free assets, I like the thought of at least directing some traffic to their authors!)
Third, regarding my own assets, I want to make them easily available for other purposes than this tutorial, too. Thus I have a separate, non-tutorial-specific repository from which one can get them.
I do recognise that the paths might be confusing. Hmm… Would it help if I were to give an outline of the intended folder-structure in the tutorial?
Hmm… If I understand correctly, that would allow me to directly link to my own repository, or to wezu’s, but still wouldn’t allow me to link to the other resources. (And even if it did, as I said, I do like the idea of directing people to the sites of the authors of those assets.)
It might be a good idea to link to the relevant sub-directory of the ReferenceCode directory at the start of each lesson, however…
I have suggestions for next tutorial if you would consider making new ones :
First person game with two weapons and the same kind of gameplay.
Including Panda AI would worth it ? Navmesh worth it ?
Something more Doom than Deus Ex.
Racing game , setup vehicle, setup ai vehicles, some nitro power ups to win the race.
Third person view space ship game, some space area to blast enemy ships and some goals like destroy some enemy base, collect some resources or cargo.
You made a fantastic tutorial, the best available, packaging is also covered, it deserves to be put in a new “game tutorials” category.
Are particles covered in the tutorial ?
After the game is packaged, what installer do you recommend ?
Thank you! I really appreciate that–it’s wonderful to read!
Particles are not covered, I’m afraid. If I recall correctly, I was feuding with Panda’s particle system at the time. (Or more accurately, the particle system had a bug that prevented sprite-based systems from being properly saved.)
(I may also have been a little put off by apprehensions that wezu, I think that it was, has voiced regarding the “ptf” file-format.)
(And in retrospect, I think that the exclusion of particles led to a stronger and more-unified overall aesthetic.)
Honestly, that I don’t know–I don’t know the various third-party installer-generators very well. Perhaps someone else in the thread might have a recommendation?
(I will note, however, that the simple archives that the build-system makes can be rather convenient for users in some cases, so under some circumstances those alone might serve.)
Honestly, this tutorial turned out to be a much larger and more draining project than I had anticipated! For the moment, at least, I don’t intend to make another one. ^^;
As to your suggestions, hmm… In the tutorial that I posted, the focus was primarily on teaching the use of Panda3D, rather than the implementation of gameplay mechanics; the game was a means to that end. If I were to make further Panda tutorials, it would likely be with the same focus–I imagine that there are other tutorials out there that teach gameplay-related concepts, even if they’re not Panda-specific.
That said, I do see value in a tutorial built around a first-person game, as there are Panda-related topics to which I think such a game would be well-suited, and that may be worth touching upon. (One example is modification of the default camera’s attributes–such as changing the near-distance for use in first-person rendering.)
I don’t know enough about Panda’s AI system to comment on whether that’s worth teaching–I don’t think that I’ve ever used it. ^^;
Panda’s Finite State Machine class, however, might be worth a lesson.
There is no need to make a new tutorial, this one is like the tutorial reference.
I could read the tutorial some more, and i think the tutorial should introduce new lessons with better coding, because i find it is very unrealistic and very outdated way to to code games that are bigger than one small scene and one main game loop logic.
What about the same game tutorial with new graphics and showing a better way to code a game ?
Entity component system
The old way to have all logic in one or two files is a bad practice and not how games are made.
ECS is the way to make bigger and scalable games, each game object like player or enemies have their own script files.
FSM
Better game management, better logic, more readable, more easy to maintain and debug.
New render pipeline
Nobody will use the default Panda 3D outdated render.
A new lesson about adding the new render pipeline to the project and using it.
Hey, if you want to do so yourself, then I won’t stop you.
I’m glad that you could read it further, if I understand you correctly!
As to taking it further, it was written for people just beginning with Panda3D, so I didn’t want to make things too complicated (hence the single level).
It addition, one of the core thoughts for this tutorial it was to provide a project that would be completed relatively quickly, to give new developers a “quick win”. This, I hope, may help to build confidence, where a more protracted first project might, I fear, discourage the reader. I already worry that it might be too long.
(Plus, as I said, this project was rather more demanding than expected, so I don’t really want to take it much further right now! ^^; )
As to a better way to code a game, the approach of which this is a basic example has served me quite well thus far, I think, scaled to the size of the project. A game of this size might have only two files; a larger game might have more. A particularly large and complex game might even have a separate class for the main menu alone, in its own file.
I disagree that there is “one right way” to make a game. If the Entity Component System serves you well, then excellent–but that doesn’t mean that it’s the only good way to design a game, or that it will suit all developers or all games, I feel.
It does make sense to split things up somewhat–and that’s what I’ve done here, moving the “GameObject” classes into a separate file. Indeed, I’d argue that the structure of the tutorial project is a simple example of what you suggest in terms of splitting up the logic across multiple files.
Given the size of the sub-classes of “GameObject” in this game, it seems superfluous to me to split them into separate files. If they were larger and more complex, then I’d likely agree.
Similarly, if were were talking about a much larger game, with which storing things in one or two files might result in a monolithic mess, then I might (somewhat) agree. But this is a small game, and I think that two files is about right for it.
Personally, I think that the default renderer looks fine. Plus, recall that I was trying to keep things simple in this tutorial.
That said, if the new render pipeline gets to the point at which it’s as easy to enable as the current shader-generator, then perhaps it might be swapped in here.