There should be three ways to get Panda3D going.
- apt install (at time of writing not working)
- Install in a python virtual environment (recommended)
- Download and install directly (manual install)
The virtual install lets you PIP install any additional packages that you
want in a sort of sandbox. So you can have for example, one project
with one version of python modules and in another virtual env different versions of the same modules as needed for your project.
Let’s try installing Panda3D:
I tried ‘pip install virtualenv’ and get that same annoying error,
Then I tried 'apt install virtual env… and guess what that installed but
we are using python3 so that is no good, the correct command:

sudo apt install python3.12-venv
perfect! I’ve created a folder called ‘workspace’ and moved to it
and now I would like to create a virtual env

python3 -m venv shenko_env
when you do ‘ls’ you will notice a folder was created!
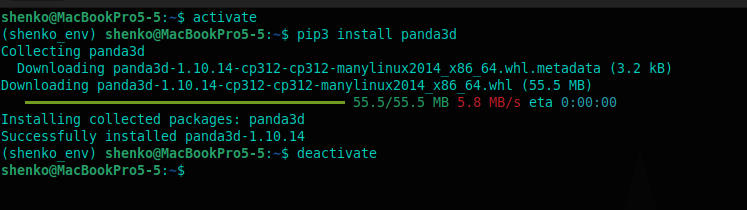
Now we want to ‘ACTIVATE’ our virtual Env!!!
in bash (terminal) you have a command called ‘source’
source command reads and executes the content of a file.
in the virtual env you created under the $youenv/bin folder is a file called ‘activate’ when you launch it using source you’ll notice your terminal prompt changes, you can shut it down by simply writting ‘deactivate’

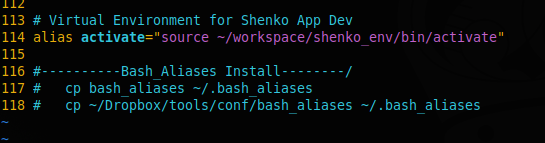
in the future I want to make this easier,
a trick is to add a ‘alias’ to your bashrc file.
or I actually wrote a bash_alias file that has a bunch of custom commands.
bash alias example tutorial
(don’t forget to restart the terminal or exit and open new one for the alias to work)
the result is ‘activate’ turns it on ‘deactivate’ turns it off
BONUS:
I keep my ‘bash_aliases’ file on my dropbox, everytime
I do a new install or modify, I just have to do ‘tail bash_aliases’
which displays the last few lines in a file, where I added a line
that I can simply copy paste, it adds the ‘.’ making it hidden and puts it on the local machine.
###—SOLVED!!!—###