Help in image texture on object

I am new to Panda3D, fairly new to 3D, but long-time programmer, in python and in other game engines.

I am trying to put images on a wall (think museum). I want to fill the wall as much as I can but retain the aspect ratio of the image. There are about 1000 images, all with different aspect ratios.

Problem: images fill the wall but either stretch to fit or sometimes double to fit.

I created the wall in Blender, exported then converted to bam. Here is the code that places the image on the wall.

		game.walls[w] = loader.loadModel("models/wall.bam")
		game.walls[w].setScale(6.0,1.0,3.5)
		game.walls[w].reparentTo(render)
		game.walls[w].setPos(0,6,0)

		ts[w] = TextureStage('ts')
		ts[w].setTexcoordName('0')
		ts[w].setMode(TextureStage.MReplace)
		print("image: "+str(w)+":"+images[inums[i]])
		wallTex[w] = loader.loadTexture("images/"+images[inums[i]])

		isizeX = wallTex[w].getXSize()
		isizeZ = wallTex[w].getYSize()
		# wallTex[w].setWrapU(Texture.WM_border_color)
		# wallTex[w].setWrapV(Texture.WM_border_color)

		asprat = (isizeX/isizeZ)
		print("asprat: "+str(asprat)+":"+str(asprats[i]))
		game.walls[w].setTexture(ts[w],wallTex[w])
		wallTex[w].setBorderColor(0)
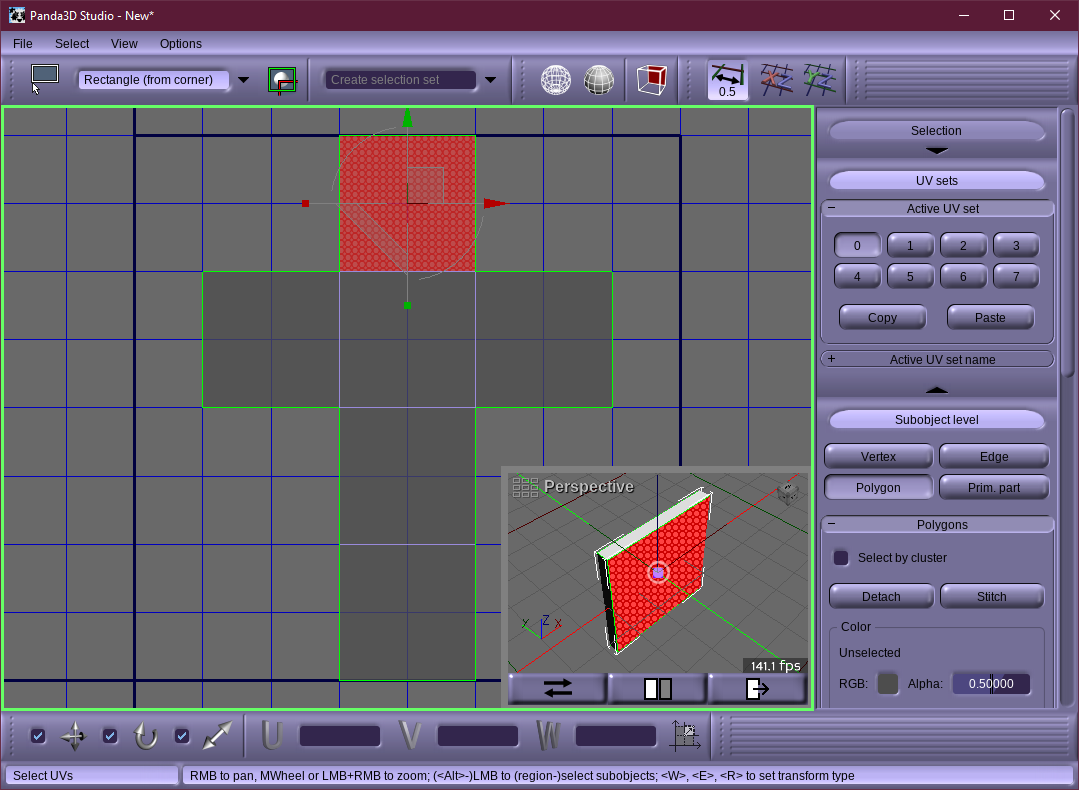
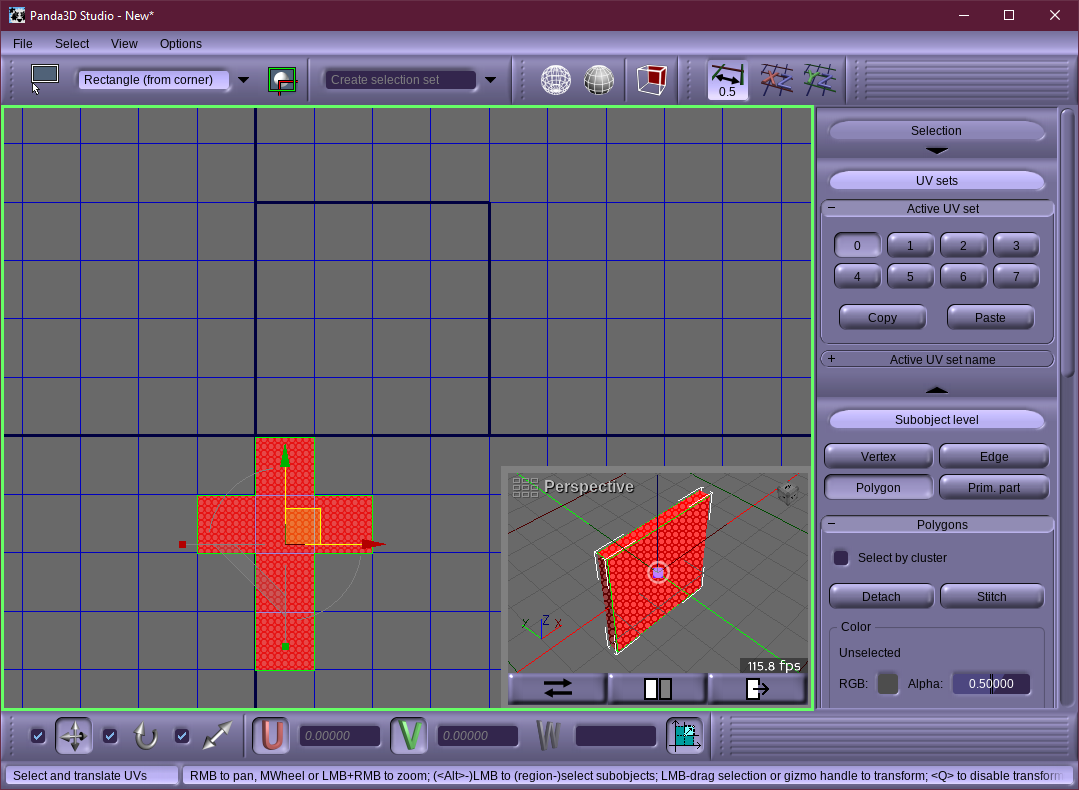
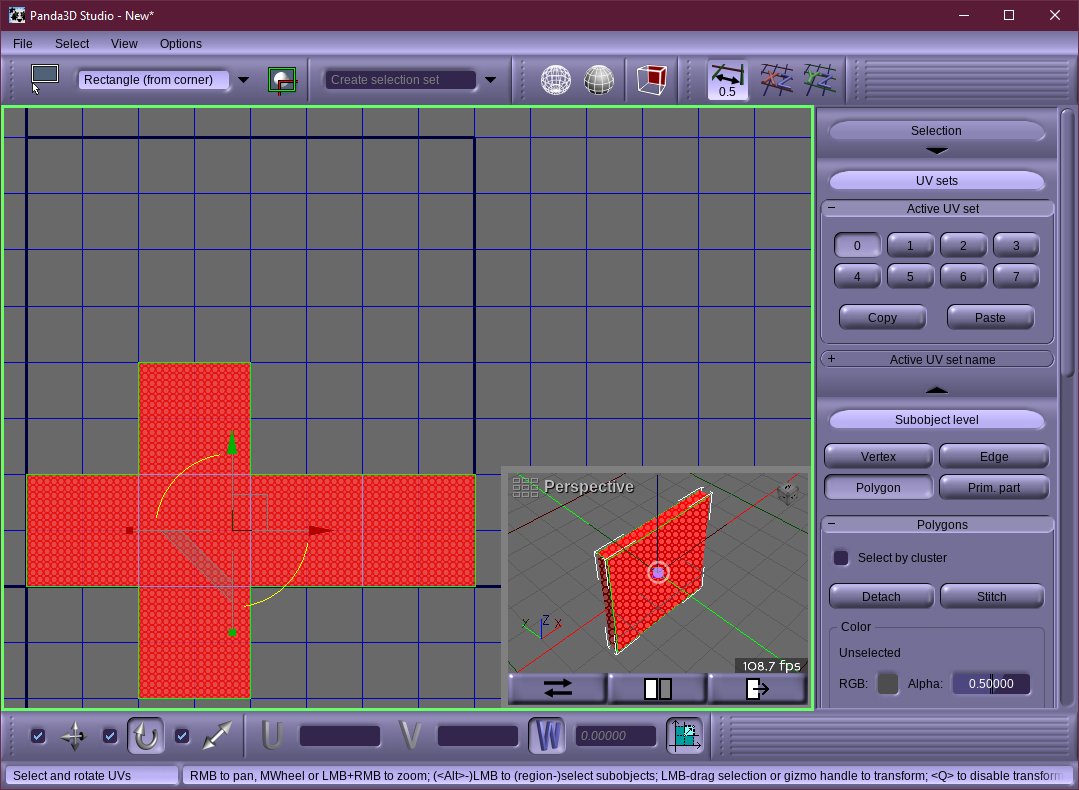
		game.walls[w].setTexRotate(ts[w],90)
		game.walls[w].setTexScale(ts[w],4,4)
		# game.walls[w].setTexScale(ts[w],4,4/asprats[i])
		game.walls[w].setTexOffset(ts[w], 0,0.5)

I have played with many variations of TexScale and TexOffsets but apparently I don’t understand how they work. Using setWrapU just makes the whole wall black. And the size calculations are all wrong – the aspect ratios are all either 1.0 or 0.5 or 2.0, not the real aspect ratios (I tried both, no improvement).

I cannot find any zoom or stretch or way to prevent those. What am I missing?

(Disclaimer: I haven’t test the below, and so may be mistaken in any or all of it! ^^; )

In part, this depends on the UV-mapping of the wall. I’m going to presume that you’ve UV-mapped your wall with values starting with (0, 0) at one corner and running to (1, 1) at the opposite corner.

This means that any image–of any aspect ratio–will be stretched over the wall such that one corner of the image is at one corner of the wall, and the opposite corner of the image is at the opposite corner of the wall.

Now, I’m not clear on exactly how you want your pictures tiled on your wall. For the purpose of this post, I’ll assume that you want the picture to take up the full height of the wall, but to retain its aspect ratio horizontally. If I’m wrong, please correct me!

Going with that assumption, we want next to look at the aspect ratio of the picture, and compare it to the aspect ratio of the wall.

If the picture is square, and the wall is square, then the picture should be fine. If however the picture is square and the wall is twice as long as it is wide, then we want to tile the picture twice over. Similarly, if the picture is half as wide as it is high, and the wall is twice as long as it is wide, then the way to tile the picture four times over. (And similarly if the picture is wider than it is high.)

So, the number of horizontal tilings that we want, then, is equal to (wall-width / wall-height) / (image-width / image-height).

Now, if I recall correctly, texture-scaling can essentially be thought of as tilings: A scale here is applied to the UV-coordinates. For example, if the UV-coordinates ran from 0 to 1, and we applied a scale of 5, then the UV-coordinates would run from 0 to 5. And since UV-coordinates from 0 to 1 correspond to the full extent of the image applied, UV-coordinates from 0 to 5 correspond to the full extent of the image applied, five times over.

(Note that this means that when you scale texture coordinates up, the size of the image on the surface goes down.)

So, in this case you would want a texture-scale with a vertical value set to 1 (so that the vertical isn’t scaled), and a horizontal value set to the number of tilings that we calculated earlier, being: (wall-width / wall-height) / (image-width / image-height).

In code, that would look something like this:

tilings = (wall-width / wall-height) / (image-width / image-height)
game.walls[w].setTexScale(ts[w], tilings, 1)

(That said, I do note that you’re rotating your texture-stage. In that case, you may find that you have to swap which of the values given to “setTexScale” corresponds to the vertical and which to the horizontal.)

[edit] Just to check: do I presume correctly that it’s not feasible for you to handle this texture-mapping in Blender? If feasible, that would seem to be by far the easiest way.

Thank you, that is helpful, especially about the texture-scaling and UV interaction. I had not understood that. But I still can’t get there.

My ideal would be the image centerd, not tiled, with the border stretched to fill the blank space. I can get to tiled (or I could if the getXSize and getYSize worked properly). I am aiming for the centered image as shown in several examples on this page:

Ah, I see getOrigFileXSize is what I want for calculating aspect ratio. But I still don’t quite know what to do with that information. It must be something with the texture automatically making a rectangle in even multiples?

The game is an exploration of using dynamic content (eg, images and descriptions provided by students), so doing Blender for all 2000 images that I now have plus any submitted by students, not really practical. If I really need to, easier to do a batch process of putting the same size background on all images. But that defeats the point of the dynamic content.

Ah, I see.

In the case, you likely do want the wrap-modes that you experimented with earlier.

Previously, you found that doing this made the wall entirely black. That suggests that you had “moved” the image off of the wall, and that you were seeing the “border”.

Hmm… Perhaps one way of getting there might be something like this:

  • Tile as I described earlier, as a working baseline.
  • Then switch the wrap-mode to something like “border_color” or “clamp”.
    • Note where the image ends up on the wall.
      • If it’s still not visible, then there may be a problem with the underlying UVs–check them in Blender in this case!
  • Now, experiment with moving the image via “setTexOffset”
    • Start with very small values–0.1, perhaps–so that you don’t move the image entirely off of the wall.
    • Note which way the image moves, and adjust accordingly.
    • I’m honestly not sure that I recall correctly which way the image will be shifted for positive or negative values in the parameters here, hence the vague directions. Sorry about that! ^^;
  • Now, use some maths to calculate the relevant offset by which to centre the image.
    • I’m tired right now, so I’m not sure of my maths, but perhaps something like “0.5*UV-scale + 0.5*image-size*aspect-ratio”. Something like that.

The aspect ratio should just be “width / height” (or vice versa), I believe.

Ah, that’s fair. I thought that it might be that you had dynamic content in mind, but thought it worth checking anyway, rather than entirely presuming.

Thank you, great help. I will start a systematic T&E. I did do what you suggested, but never saw the image at all in any of the wrap modes, so I thought I was using them wrong. I’ll start back and try being very systematic.

Thank you.

1 Like

Still odd – with some combinations I see a bunch of horizontal colored lines that I can bring back onto the table. I don’t understand UV stuff. What do I look for in the Blender?

If it’s still not visible, then there may be a problem with the underlying UVs–check them in Blender in this case!<<

Let me note that I’m using Blender 2.78c; I believe that the UI has changed in more-recent versions, so my instructions may not match them.

That said, in Blender select your wall-model and enter “edit” mode (so that the vertices are visible). Now, look for the “UV/Image editor” panel–in my version it’s by default to the right of the 3D view, I think.

In the “UV/Image editor”, look for further vertices–these correspond to the UV-coordinates of your mesh.

If you see no vertices at all in the “UV/Image editor”, then this may be your problem: you have no UV-coordinates for your wall. As a result, you may be seeing only a single pixel of your images, smeared across the entire wall.

In this case, you might want to either give your wall UV-coordinates (there should be tutorials for this online; possibly consider the UV-projection modifier), or to look into Panda’s texture-coordinate generation facilities (see here). The former is likely more flexible and powerful than the latter, but the latter may be easier if you’re not familiar with UV-mapping.

The wall certainly has UV coordinates. Below is a link to the egg file. I am reading about UV, trying to understand how to apply the concepts.

wall.egg

I solved the problem a different way. I put two walls, one full size very slightly behind the other, projected the image on the front wall, and resized the front wall to fit the aspect ratio of the image. Works great. Didn’t help me understand the UV coords, but a solution that works very well.

I tried changing the wall in Blender to be the aspect ratio in the game, and that did not help.

1 Like

Ah, I’m sorry to read that you didn’t figure out where the problem lay in your UV-based approach!

Conversely, however, I’m glad that you found a way to achieve what you wanted, or close enough! :slight_smile:

I took a quick look at the UVs of your wall, and I suspect that the layout of them might have been part of the problem: there’s quite a lot of “blank space” there, and it may be that your images were being “lost” in that, and thus not appearing on the wall.

Furthermore, the scale of the UV-layout may have complicated the calculation of an appropriate texture-scale for your images, anyway.

Thank you for taking the time to look at it. I would like to get the simpler solution to work, but am still in the dark about what has to be done. I understand what you say about it, but don’t know what to do differently. The wall is just the simplest default cube from Blender, flattened in the y axis, then exported. Are there a simple set of settings I should change in Blender? Well, I don’t want to waste your time on it, but I think it will take a much bigger investment of my time to understand how Blender and the UV works.

Honestly, I think that what you have might be the simpler solution. It works, and it doesn’t require any messing about with your UV-map or texture-scaling.

If you set the config variable textures-power-2 to none it should work (otherwise the texture sizes are scaled down to the nearest power of 2).

The problem with UVs is that not only should they be transformed inversely, but the different transformation types should also be applied in the opposite order, i.e. instead of the default scaling-rotation-translation order, it should be translation-rotation-scaling.
This cannot be achieved using the set_tex_offset, set_tex_rotate and set_tex_scale methods, because even if you call them in that order, they will still be applied in the default order, leading to wrong results. What you need in this case is set_tex_transform, which you pass a matrix transform:

mat = Mat3.translate_mat(x, y) * Mat3.rotate_mat(angle) * Mat3.scale_mat(sx, sy)
transform = TransformState.make_mat3(mat)
wall.set_tex_transform(ts, transform)

Looking at the UVs of your wall.egg model in my self-made modelling program, I figured out the correct transform values. Assuming you want to show the textures on the side facing the negative Y-axis:

I visualized it like this:

First, offset the UVs by (-0.375, -1.0):

Then, rotate them 90 degrees:

And finally, scale them by a factor of 4, so the target UV polygon takes up the entire UV-space.

If you also want to center the textures, the offset and scale need to be modified further.
Below is a code sample that should work as you want it:

from direct.showbase.ShowBase import ShowBase
from panda3d.core import *

load_prc_file_data("", "textures-power-2 none")

base = ShowBase()

wall = base.loader.load_model("wall.egg")
wall.reparent_to(base.render)
tex = base.loader.load_texture("my_texture.png")
tex.set_wrap_u(SamplerState.WM_border_color)
tex.set_wrap_v(SamplerState.WM_border_color)
ts = TextureStage("ts")
ts.set_texcoord_name("0")
wall.set_texture(ts, tex)
aspect_ratio = tex.get_x_size() / tex.get_y_size()
x = -.375
y = -1.
sx = 4.
sy = 4.

# modify offset and scale based on aspect ratio
if aspect_ratio > 1.:
    x -= (.25 - .25 / aspect_ratio) * .5
    sy *= aspect_ratio
else:
    y += (.25 - .25 * aspect_ratio) * .5
    sx /= aspect_ratio

mat = Mat3.translate_mat(x, y) * Mat3.rotate_mat(90.) * Mat3.scale_mat(sx, sy)
transform = TransformState.make_mat3(mat)
wall.set_tex_transform(ts, transform)

base.run()

If you wanted the texture on the other side of the wall, then I’ll leave that as an exercise to the reader :stuck_out_tongue: .

1 Like

I also tell myself that it more accurately represents a museum wall with a picture hanging on (in front of) it.

1 Like

Oh, there’s so much text here, but an easy task. The whole secret is that you need to configure the model hierarchy. For the image, create a proper 1-by-1 plane, and then scale it along the axes using the image dimensions. Apply the transformation and scales again, the only problem is that the picture frame needs to be generated programmatically, but I have attached a variant that works.

from direct.showbase.ShowBase import ShowBase
from panda3d.core import load_prc_file_data
load_prc_file_data("", "textures-power-2 none")

class FotoWall(ShowBase):
    def __init__(self):
        ShowBase.__init__(self)

        wall = loader.loadModel("models/wall")
        wall.reparent_to(render)

        picasso = self.load_painting(model = "models/canvas", texture = 'panda.png', scale = 0.0015)
        picasso.set_pos(0, 0, 0)
        picasso.reparent_to(render)
        
        banksy = self.load_painting(model = "models/canvas", texture = 'ralf.png', scale = 0.0015)
        banksy.set_pos(0, 2, 0)
        banksy.reparent_to(render)
        
    def load_painting(self, model, texture, scale):
        tex = loader.loadTexture(texture)
        mod = loader.loadModel(model)
        mod.set_scale(1, tex.getXSize()*scale, tex.getYSize()*scale)
        mod.set_texture(tex)
        fr = mod.find("**/frame")
        fr.setTextureOff(1)
        fr.set_color(0, 0, 0, 0)
        mod.flatten_light()
        return mod

FotoWall().run()

TexWall.zip (1.8 MB)

1 Like

Thank you, that is great and simple, even I can understand it. I will roll it in.

(Does the Banksy also shred itself over time?)

Not really, but…

from direct.showbase.ShowBase import ShowBase
from panda3d.core import load_prc_file_data
load_prc_file_data("", "textures-power-2 none")

class FotoWall(ShowBase):
    def __init__(self):
        ShowBase.__init__(self)

        wall = loader.loadModel("models/wall")
        wall.reparent_to(render)

        picasso = self.load_painting(model = "models/canvas", texture = 'panda.png', scale = 0.0015)
        picasso.set_pos(0, 0, 0)
        picasso.reparent_to(render)
        
        self.banksy = self.load_painting(model = "models/canvas", texture = 'ralf.png', scale = 0.0015)
        self.banksy.set_pos(0, 2, 0)
        self.banksy.reparent_to(render)

        taskMgr.doMethodLater(10, self.shred, 'shred')

    def shred(self, task):
        self.banksy.remove_node()

    def load_painting(self, model, texture, scale):
        tex = loader.loadTexture(texture)
        mod = loader.loadModel(model)
        mod.set_scale(1, tex.getXSize()*scale, tex.getYSize()*scale)
        mod.set_texture(tex)
        fr = mod.find("**/frame")
        fr.setTextureOff(1)
        fr.set_color(0, 0, 0, 0)
        mod.flatten_light()
        return mod

FotoWall().run()
1 Like

!!..(had to make it 20 char)

1 Like

@Epihaius

Thank you for putting so much time into this, I understand it much better. It would have taken me weeks to realize that the order matters, then more weeks to realize that I have to use set_tex_transform to force the order, though of course now they make sense.

1 Like

Glad to hear that my wall of text helped you with your textured wall :wink: .

2 Likes