Hello, everybody.
I am a newbie. Recently I want to build up a 3d-simulator and panda3d was recommended by the forums. It’s wonderful but I met some problems which discourses as well as documents may not include.
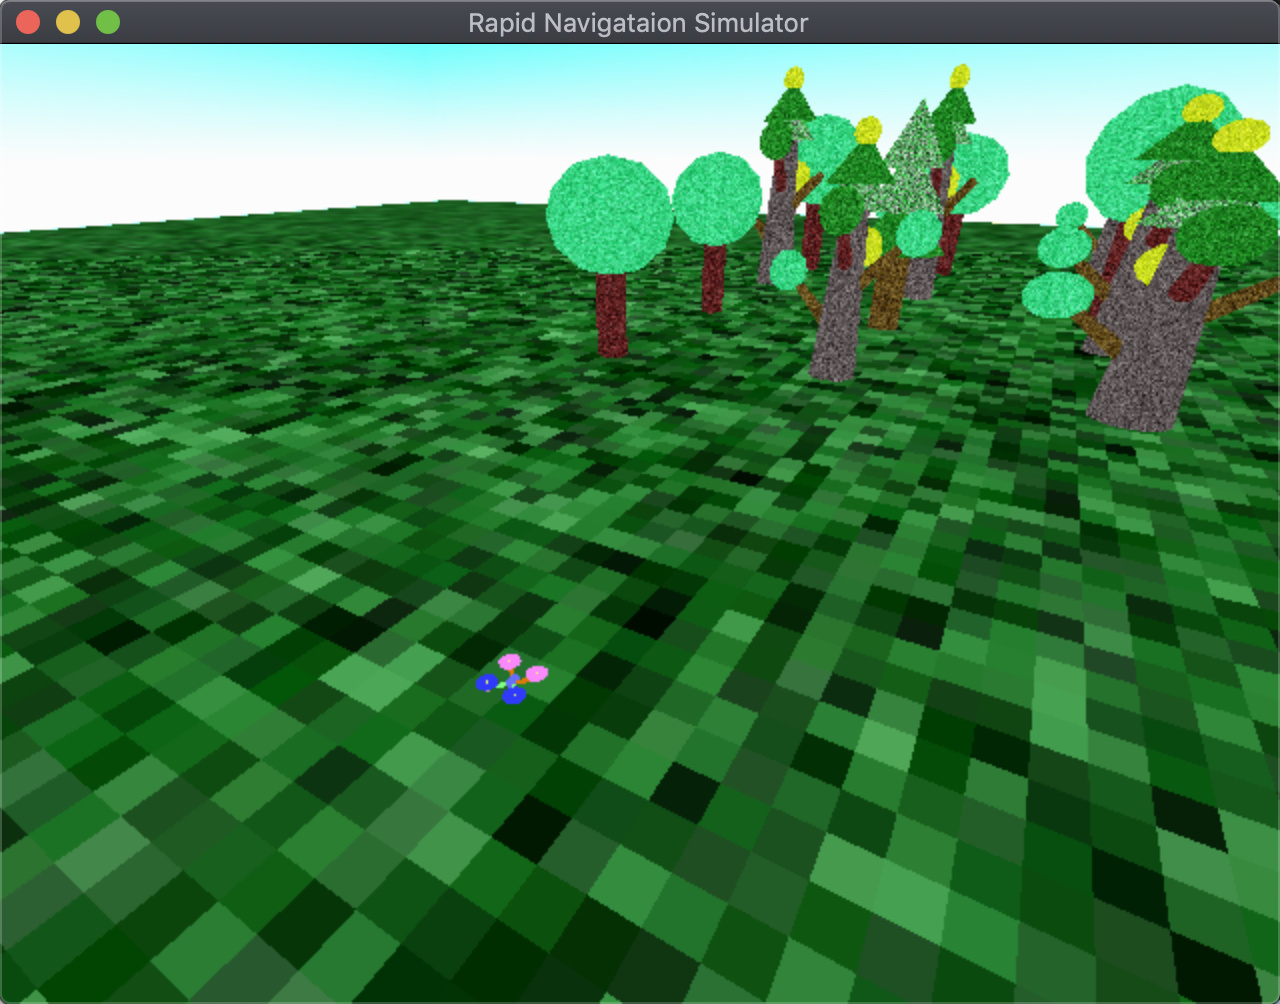
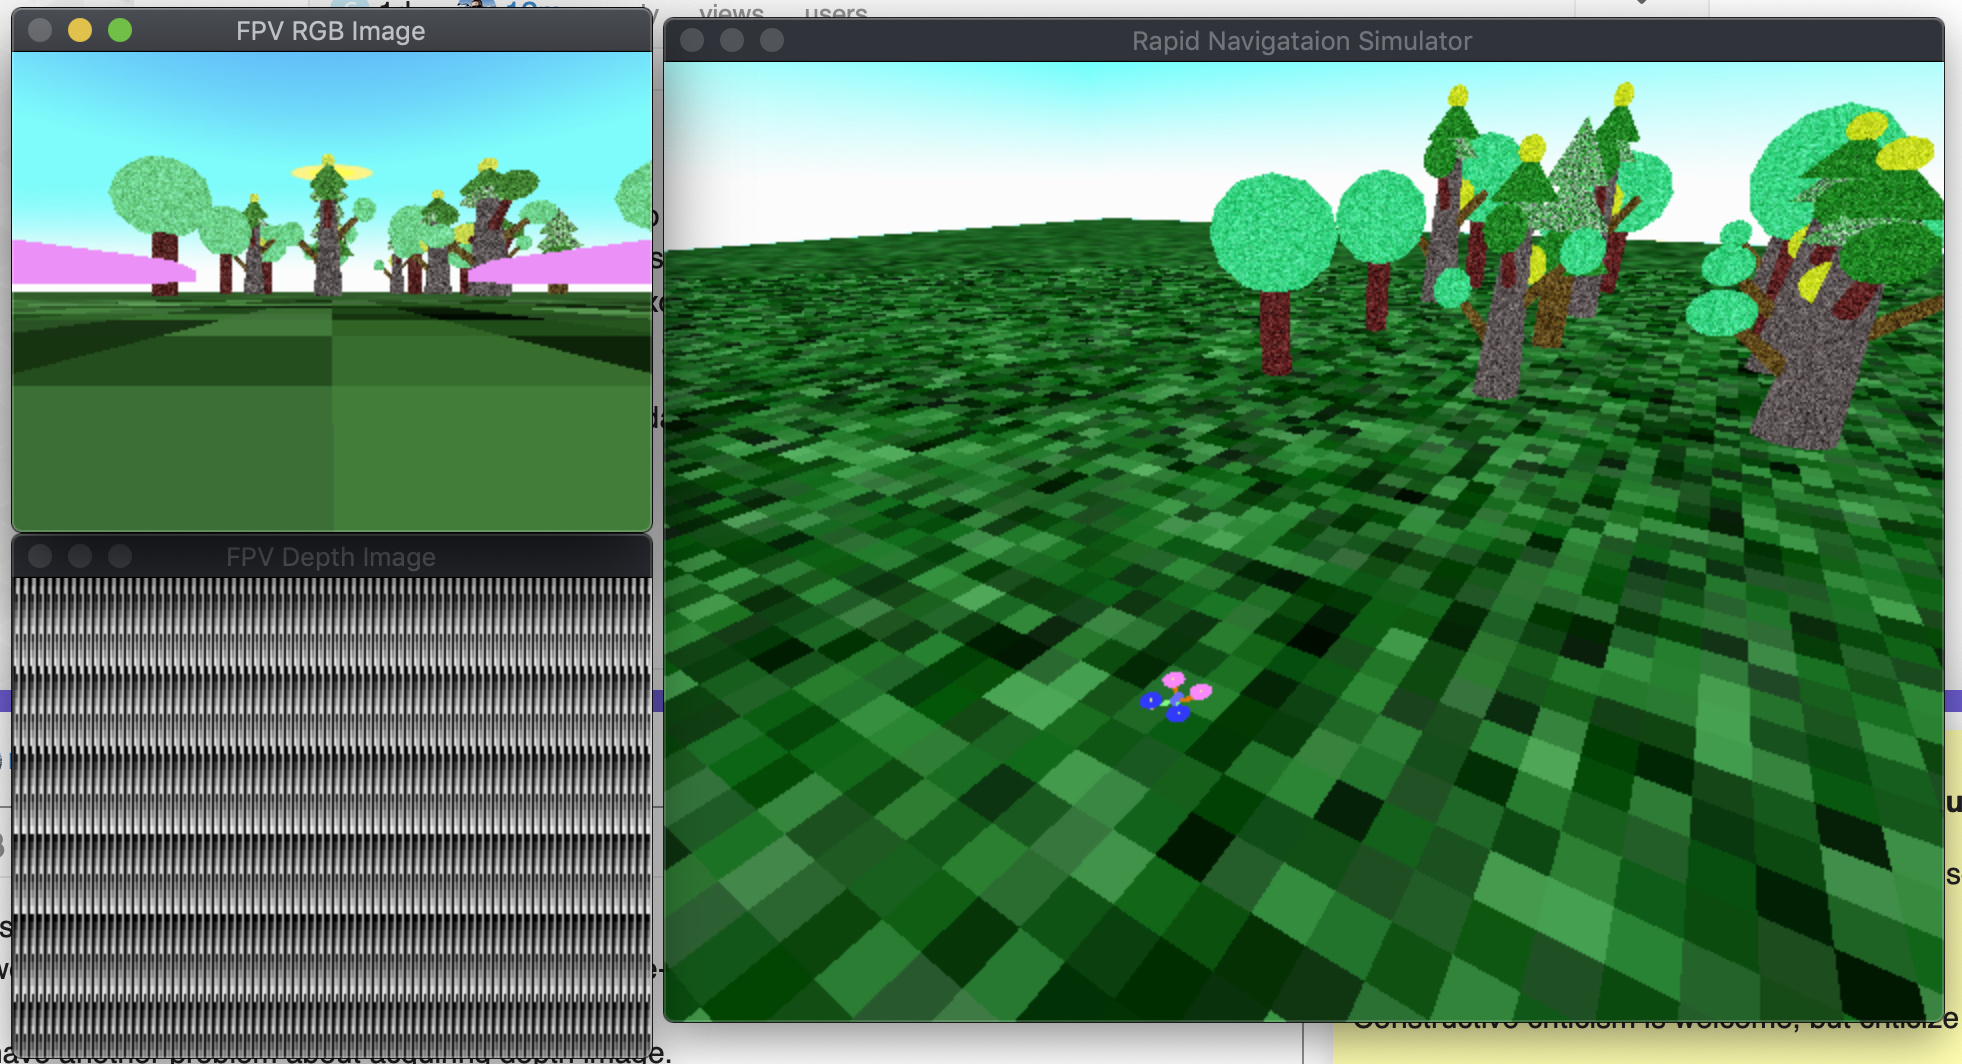
My intended simulator has a god view which is display on a window. In addition, it has some offscreen buffers which indicate the characters’ view sights. Just like a god have a global viewpoint seen from the sky and several persons’ sight from their eyes, while god view is displayed on window and individual views are intended to be converted to opencv Mat format for further processing.
I met the problem at converting individual views to opencv mat in c++ coding. Sample project named render-to-texture coded in python has been referred but some differences of API between python and
c++ confuse me. makeCamera in python should pass the parameter buffer while make_camera in c++ needn’t. I noticed a similar question but I was still unable to acquire image data. Here is my code:
void Scene::setup_quadcopter_camera(std::string label) {
        std::string _name = generate_object_name(label); // a member function just generate name
        auto _buffer = window_framework->get_graphics_output()->make_texture_buffer(_name, 320, 240);
        auto _texture = _buffer->get_texture();
        _buffer->set_sort(-100);

        auto _camera = new Camera(_name);
        auto _lens = _camera->get_lens();
        _lens->set_fov(90, 60);
        _lens->set_film_size(0.032, 0.024);
        _lens->set_near(0.05);

        auto _camera_np = window_framework->get_render().attach_new_node(_camera);
        _camera_np.set_pos(0.0, 0.0, 0.1);

        auto _region = _buffer->make_display_region();
        _region->set_camera(_camera_np);
        _camera_np.reparent_to(window_framework->get_render());

        graphic_aeros.push_back(_buffer); // graphic_aeros is std::vector<GraphicsOutput*> type
}

void Scene::get_quadcopter_fpv_image(std::string label, cv::Mat &image) {
        size_t index = get_camera_index_from_label(label);
        auto _buffer = graphic_aeros.at(index);
        auto _texture = _buffer->get_texture();
        CPTA_uchar _pic = _texture->get_ram_image_as("BGR");
        void *_ptr = (void*)_pic.p();
        image = cv::Mat(320, 240, CV_8UC3, _ptr, cv::Mat::AUTO_STEP);
        cv::flip(image, image, 0);
}
It compiles well, however the program run and quit immediately without any errors or warning but exit code =17. I have no idea about how to solve the problems. Did I misunderstand the API or any ignorance?
Thanks.
2. Information
Panda3D Version: 1.10
OS Version: Mac OSX 10.14.6
OpenCV Version: 4.1.0 (I noticed panda3d has 2.4.3 version internal libraries)
It might have something to do with the fact that you’re not using any smart-reference-counting pointers where it’s needed (such as in PT(Camera) _camera = new Camera(_name);, and NodePath _camera_np = ...). Excessive use of auto can easily obscure what types of references your variables are being stored as.
Does cv::Mat copy the data for the pointer that is passed in, or does it continue to refer to the data in _ptr?
But now I have another problem about acquiring depth image. A similar topic was discussed and I followed its codes but unfortunately it didn’t work for me. As you see above, the depth image is incorrect. Something wrong also displayed:
Known pipe types:
  CocoaGraphicsPipe
(all display modules loaded.)
:display:gsg:glgsg(error): GL error 0x502 : invalid operation
:display:gsg:glgsg(error): An OpenGL error has occurred.  Set gl-check-errors #t in your PRC file to display more information.
:display:gsg:glgsg(error): GL error 0x502 : invalid operation
:display:gsg:glgsg(error): An OpenGL error has occurred.  Set gl-check-errors #t in your PRC file to display more information.
Firstly, which version of Panda3D are you using? Please make sure you are using 1.10.5, the latest.
Secondly, it may be useful to run your application through “apitrace trace” and send the resulting .trace file, so that I can see whether there are invalid OpenGL calls being made by Panda.
You can also try RTP_depth instead of RTP_depth_stencil to see if that has a different result.
Oh, I just noticed you are using FT_shadow. I recommend you take that out unless you are trying to do shadow mapping. Just in case that is interfering somehow.
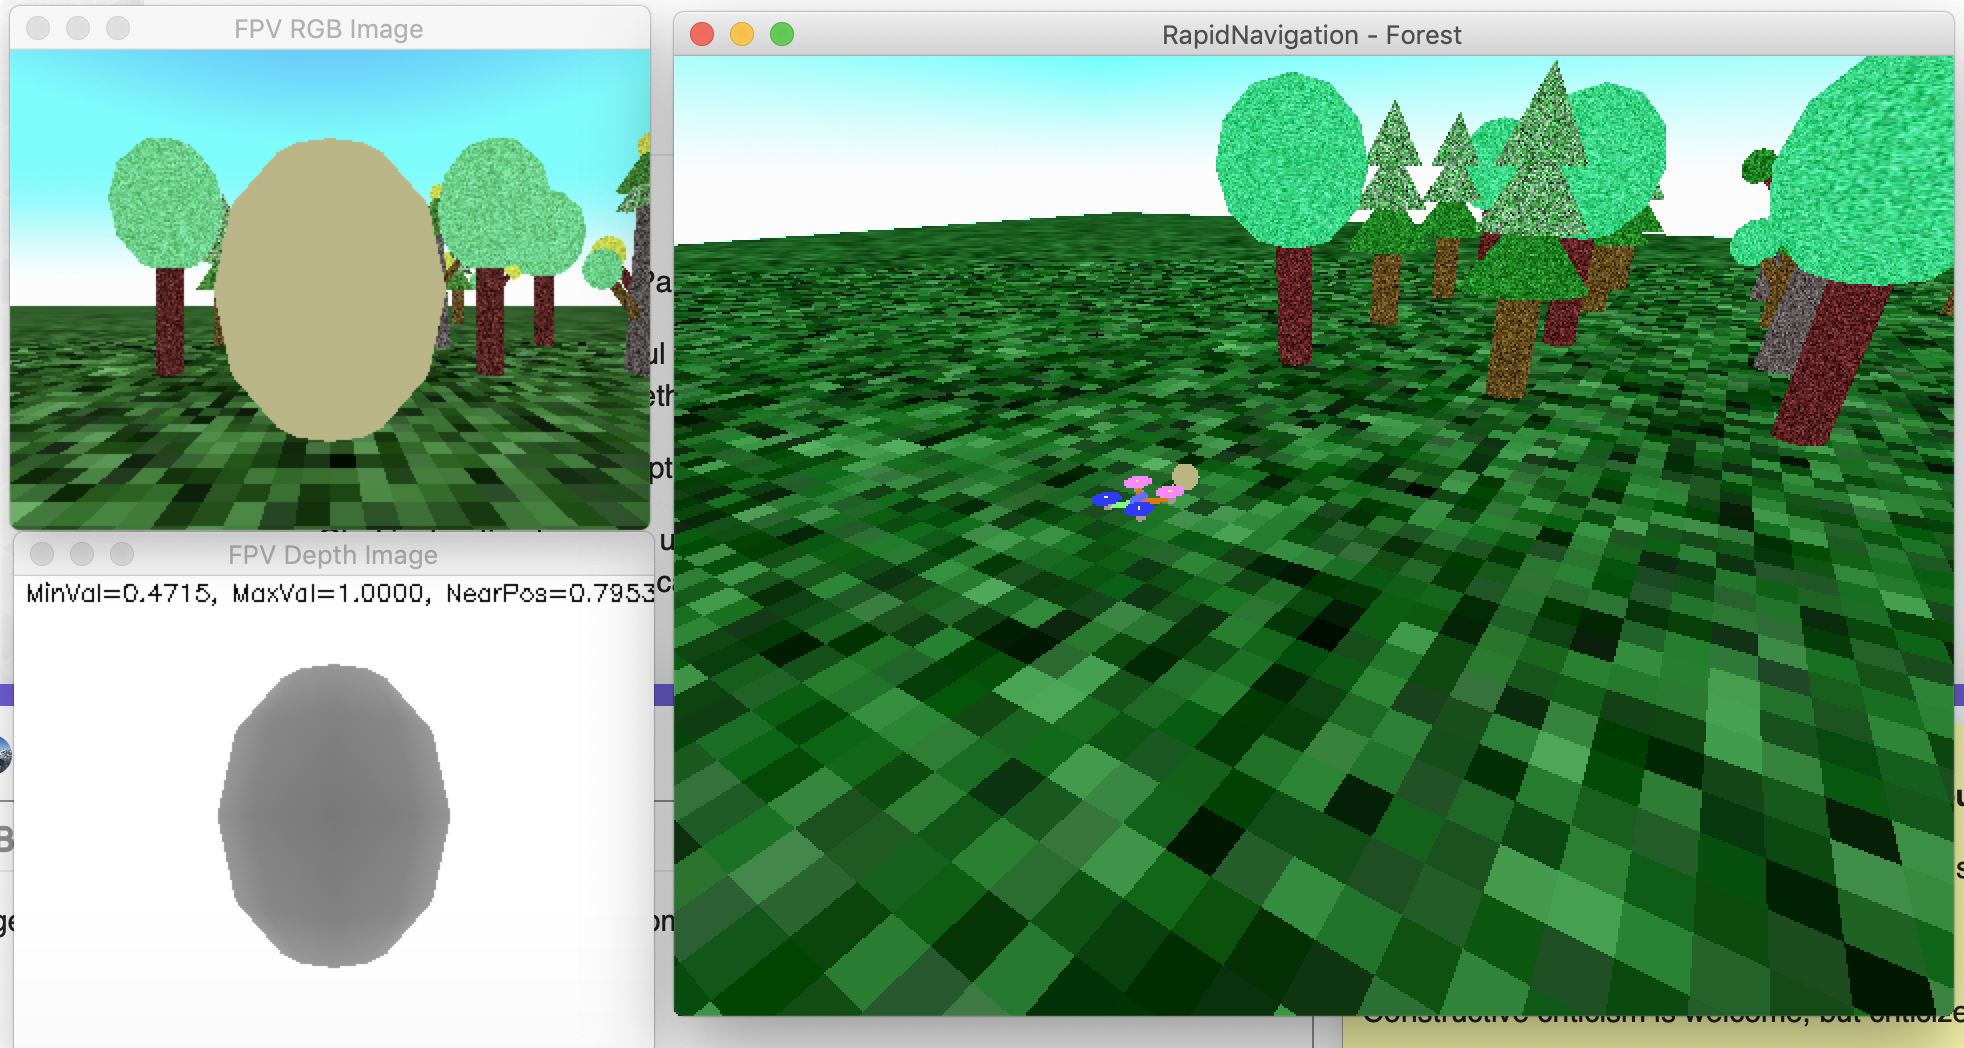
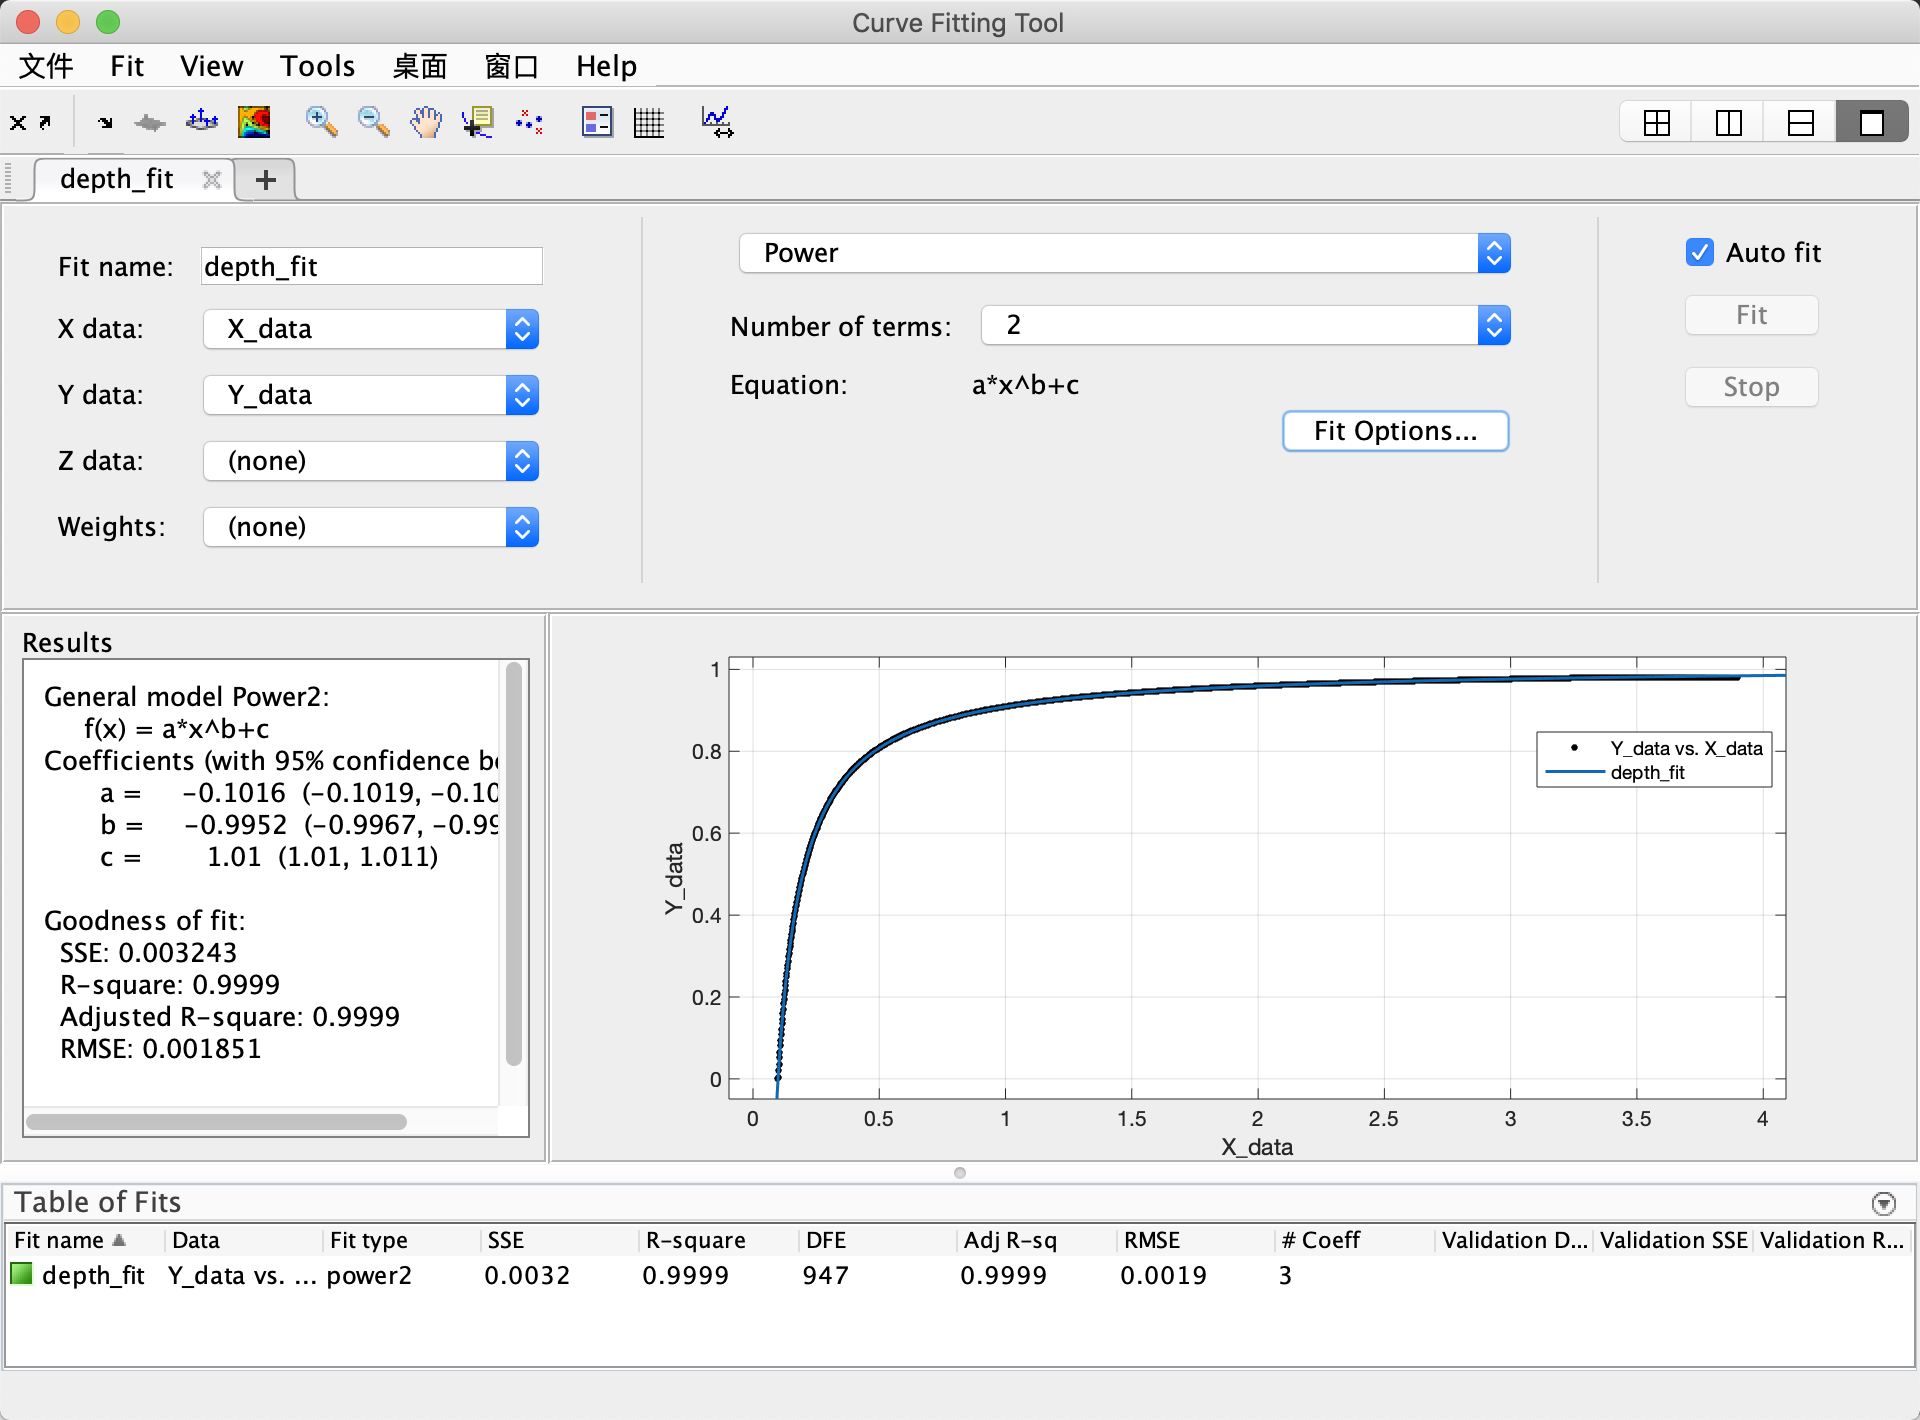
But now I wonder how to understand the result of the depth image which is specified as CV_32FC1 format for each pixel. A ball was used to test the pixel value with respect to distance between the camera and the ball. Result was drawn below by Matlab where seemed a bit strange… The relationship between pixel-value and distance is not linear. I used tool to fit and the equation y=a*x^b+c where a=-0.1016, b=-0.9952, c=1.01. Also the parameters showed kind of relevance with camera lens.
No, it is certainly not linear. You will need to feed the depth value through an equation that takes the near and far distance of the camera lens as parameters in order to get the linear depth. Just Google “linear depth”; there are plenty of resources on this.
The alternative is to write a shader that writes the linear depth values to the color buffer.
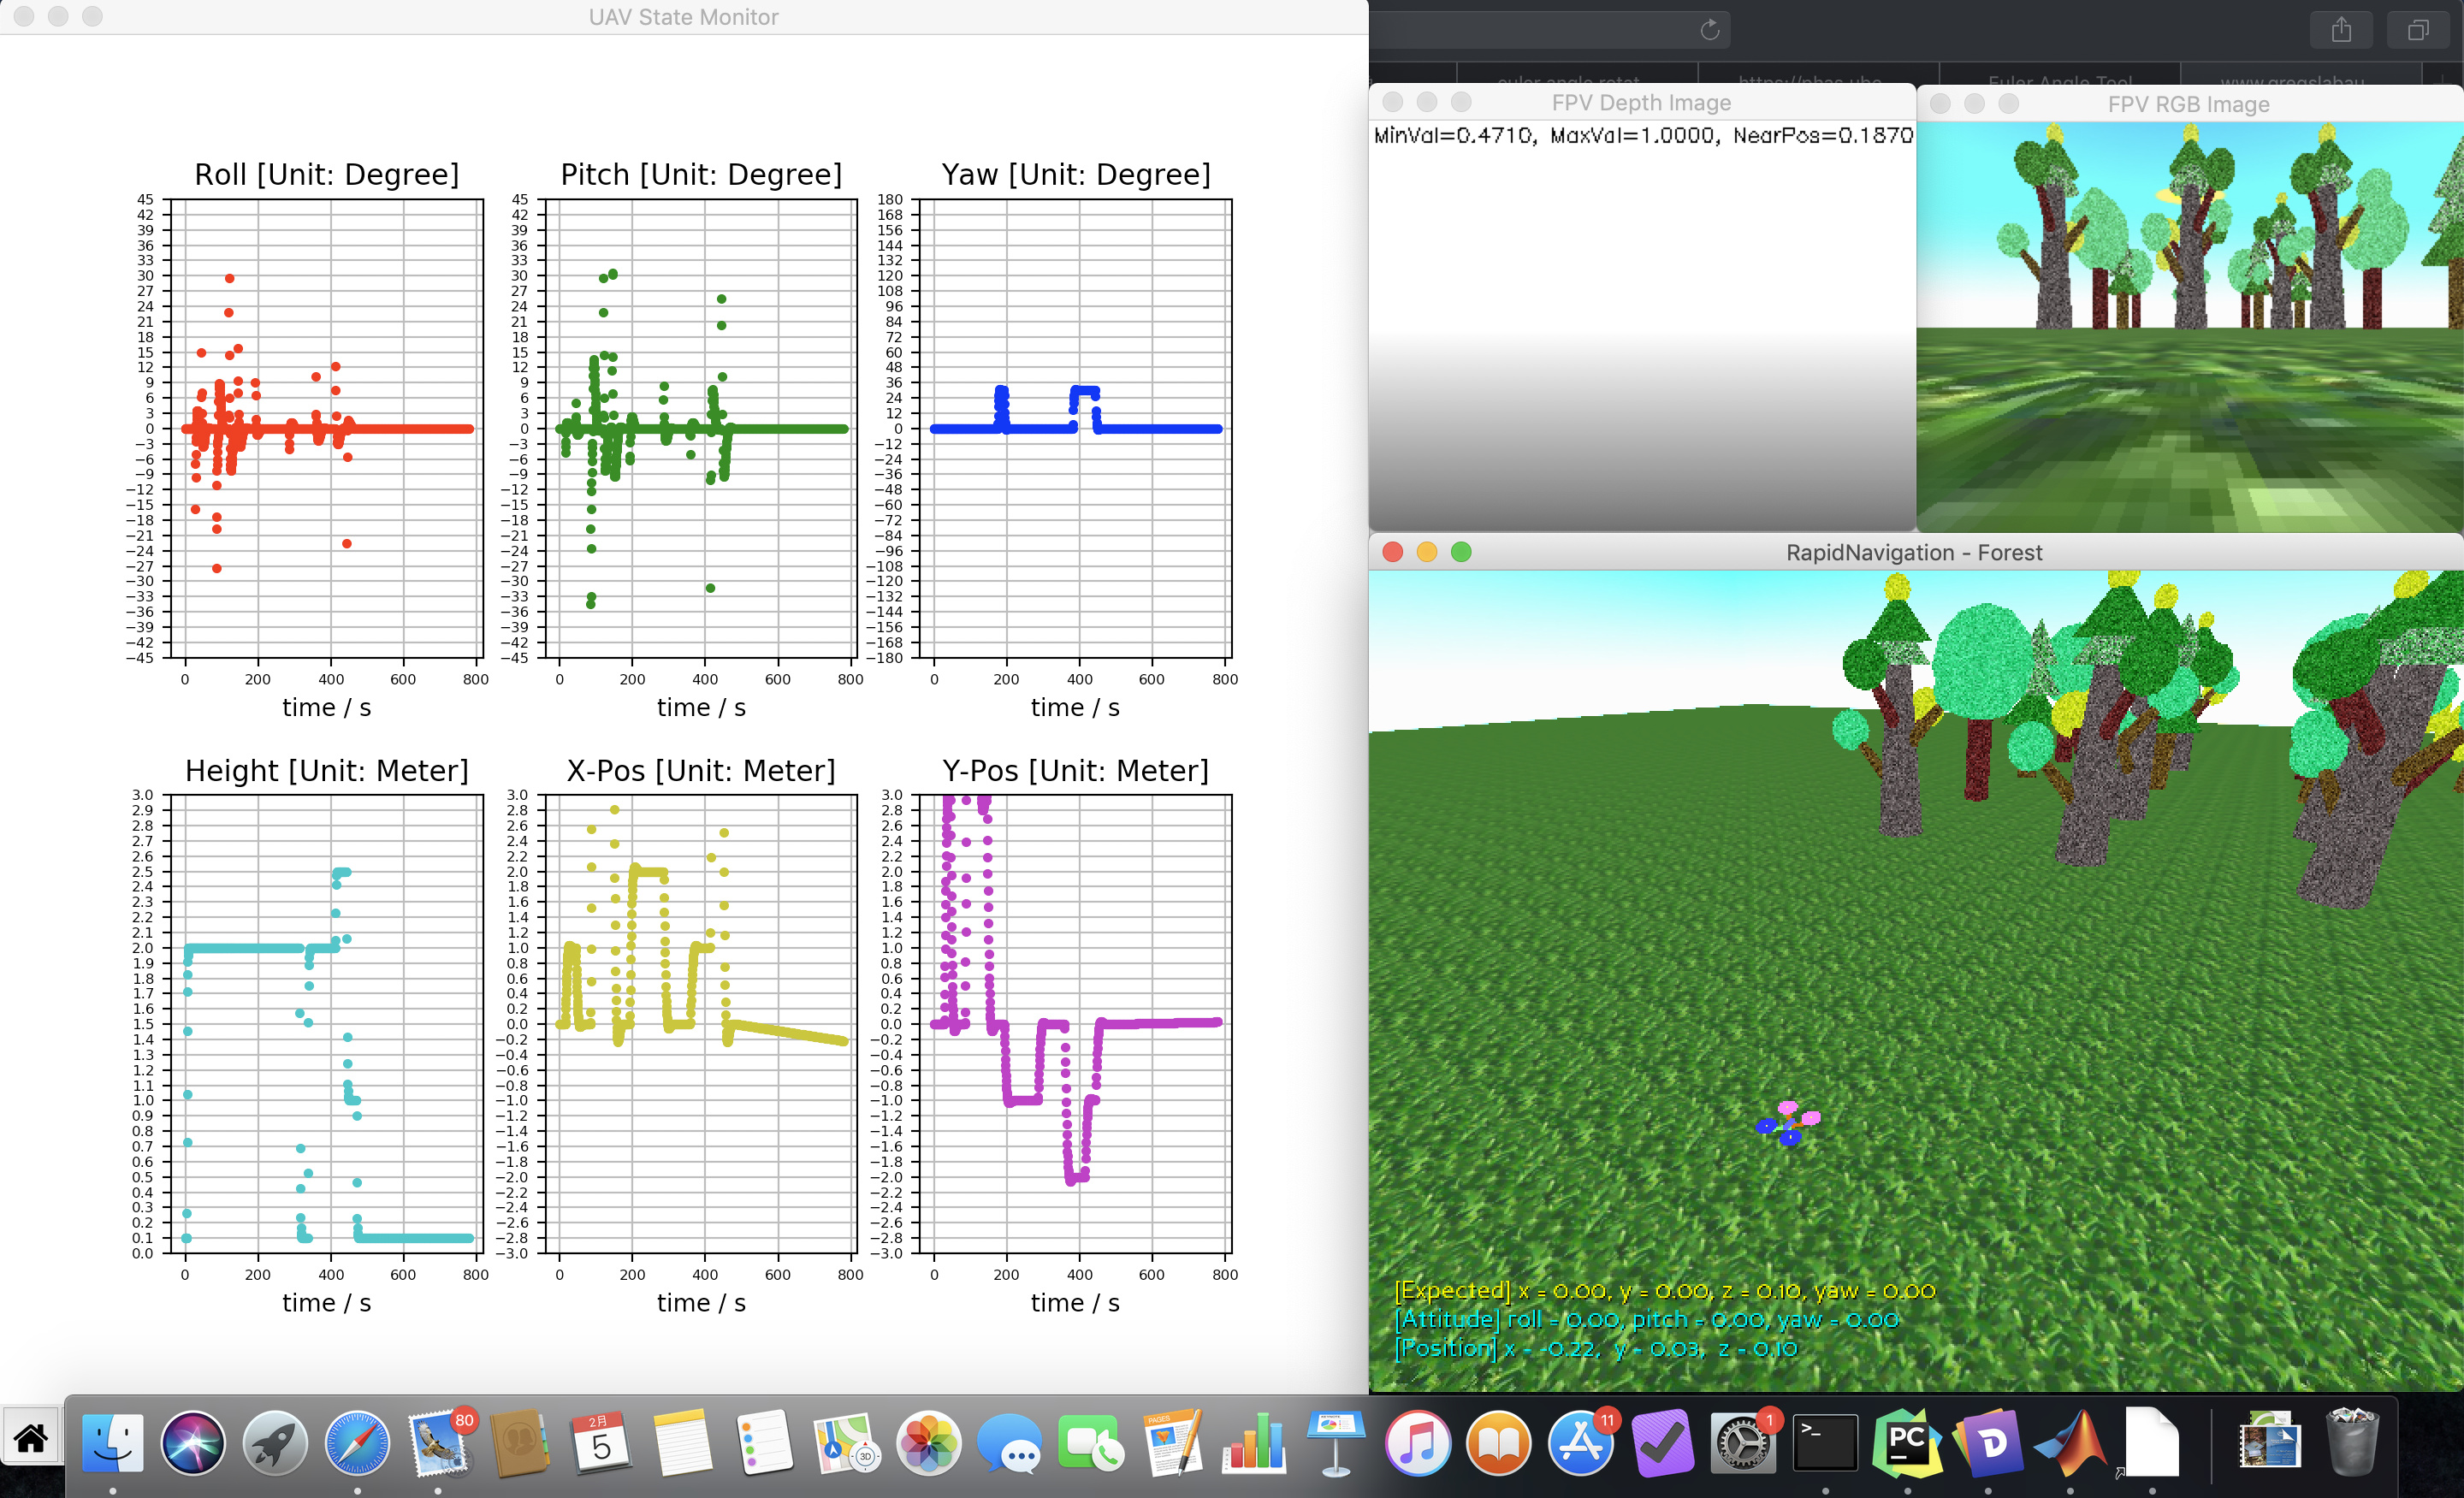
Thanks to @rdb help and guidance, I completed a simple simulator for quadcopter. According to the suggestions of panda3d docs, finally I transferred the C++ code into Python. Amazingly, there is mere significant difference in the performance of speed between them. Moreover, python is more convenient to debug.
The simple simulator, which was first aimed at emulation for rapid navigation in forests, contains the primary physical model of quadcopter, the simple terrain, the simulation sensors of IMU, RGB-camera, depth-camera, event-camera, interfaces with Matlab. The code of PyRealSim is on GitHub if someone needs.